Category Archives: TearDown

How to disassemble (teardown) Apple products such as iPhone and more.

iPod Touch 5th Gen Battery Replacement: How To

Introduction

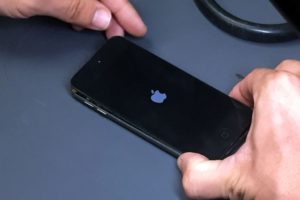
iPod Touch 5th gen battery replacement is moderately difficult. The eight clasps holding the screen onto the body will make snap noises when they are unclasped. Don’t immediately pull the screen from the body as you will probably tear the cable to the home button. Step by step instructions are below the video.

Tools Needed

  • Razor Blade
  • Metal Spudger [BUY]
  • Phillips Head Screwdriver #000 [BUY]
  • Hot Air Rework Station
  • Spudger [BUY]
  • Soldering Station
  • Flux

Recommended: Magnetic mat [BUY], screw capsules [BUY]

General Repair Guidelines:

  • Always use good lighting – smart device components are small and you’ll need plenty of light to see what you
    are doing.
  • Maintain a clean, organized workspace so you don’t lose or confuse any components.
  • Apply enough heat to loosen adhesive but not enough to damage the device.
  • After separation, keep the back housing and screen in close proximity until all flex cables or other wire
    cables are disconnected.

iPod Touch 5th Gen Battery Replacement Steps

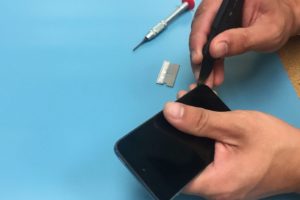
  1. Starting at the bottom near the home button, slide the corner of a razor blade in between the screen and the
    bottom frame to begin separating the screen from the body.
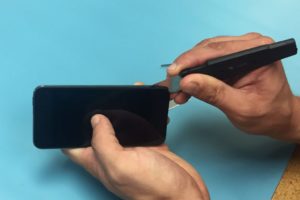
  2. Use the metal spudger to slowly and carefully separate the glass screen of the iPod from the body. Start on the
    bottom edge of the device and proceed slowly. Eight brackets connect the screen to the body.
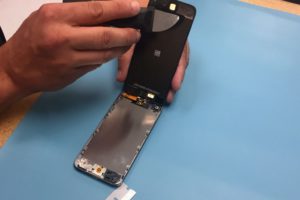
  3. Continue using the metal spudger to gently separate the glass from the body up the sides and across the top. Don’t
    push too deeply towards the center of the device. When all the brackets have been pryed open, slowly pull the
    top of the screen away from the body.
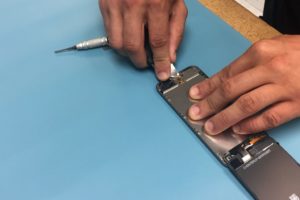
  4. The home button is connected via an orange flex cable, so do not pull the back glass far from the frame.
    Disconnect the cable from the heat shield of the iPod.
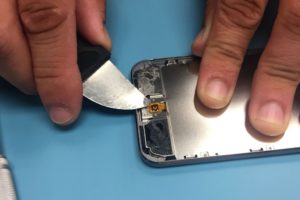
  5. After disconnecting the home button flex cable, remove the eight screws from the silver heat shield and set to
    the side.
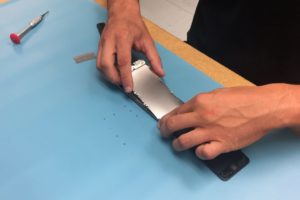
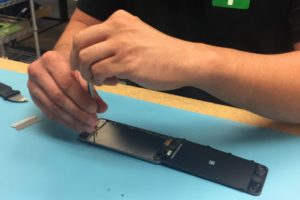
  6. The next steps involve removing the battery flex cable using a hot air rework station. Focus the heat on the
    black film and Kapton tape that needs to be removed while heating. This is located on the left side just above
    the battery.
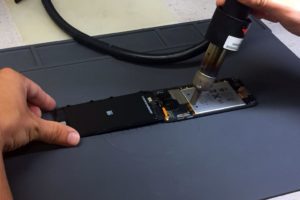
  7. Once the cable can be removed, pop out the battery with a spudger.
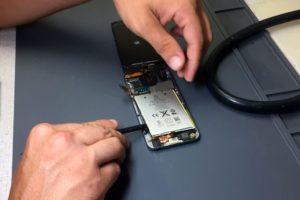
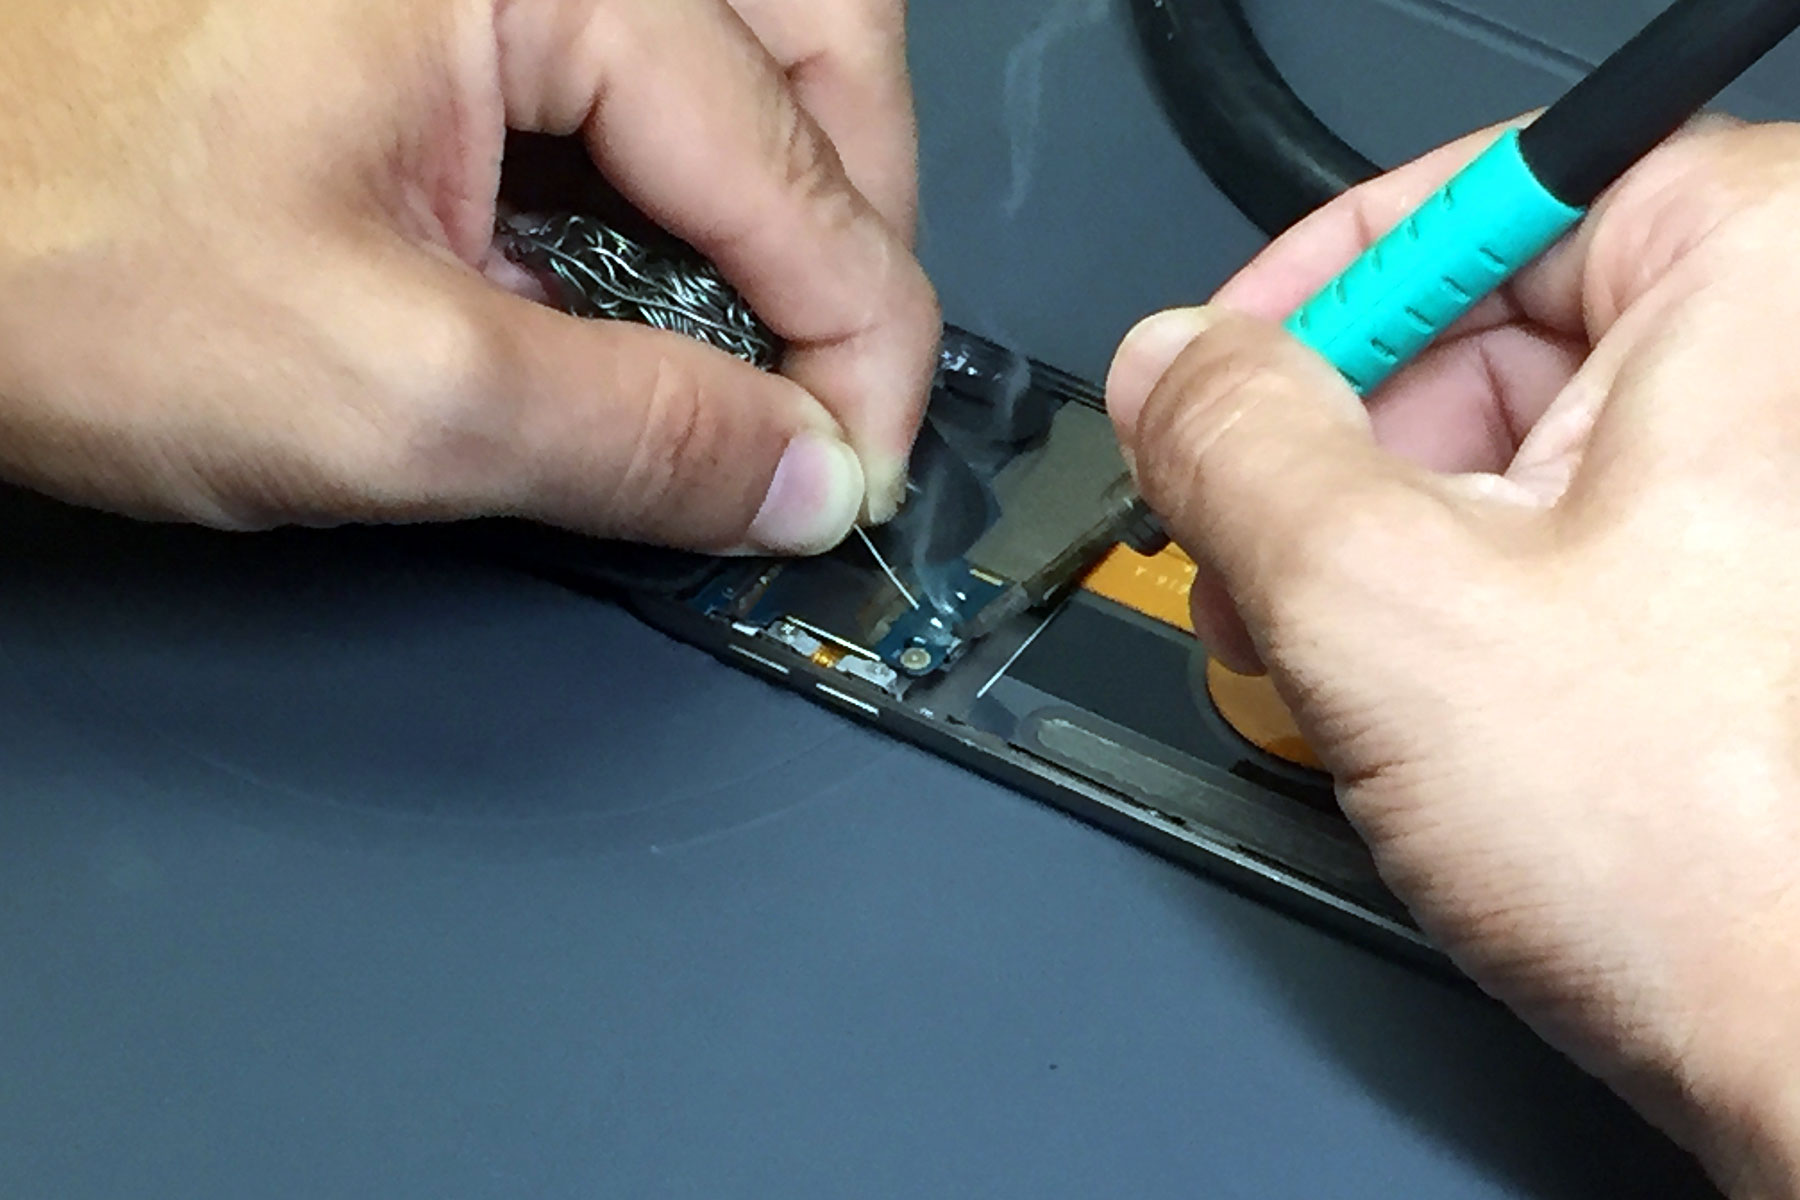
  8. The replacement battery must be soldered into place using a soldering iron, flux, and tweezers to hold the
    cable in place.
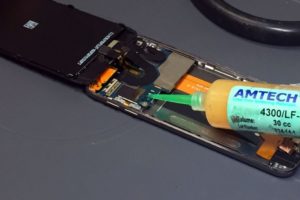
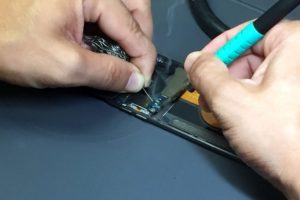
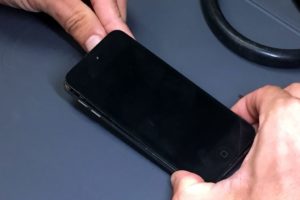
  9. With your new replacement battery connected, you should now be able to boot up the device. You can work
    backward from step 7 to complete the repair. Be sure to cover the new solder points with Kapton tape before
    reinstalling the heat shield. If Kapton tape is not added the heat shield could short out the device.
For Help, Repairs, or Parts

If you need parts or tools for this repair, or if this repair is too much to attempt on your own and you need
professional help with your iPod Touch Repair, contact iFixYouri at 888-494-4349 or www.ifixyouri.com.

Galaxy S8 Screen Teardown: How To

Introduction

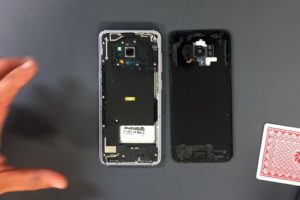
The Samsung Galaxy S8 screen is moderately difficult to tear-down. Proper attention should be given to safely loosening the adhesive strips with heat. Keep an eye out for the connector cable to the fingerprint sensor on the back panel, and the screen flex cable which feeds through an opening in the body. So let’s get to it! Look for the text directions below the video. Check out iFixYouri on youtube for more repair videos.

Tools Needed:

Recommended: Magnetic mat, screw capsules

General Repair Guidelines:

  • Always use good lighting – smart device components are small and you’ll need plenty of light to see what you are doing.
  • Maintain a clean, organized workspace so you don’t lose or confuse any components.
  • Apply enough heat to loosen adhesive but not enough to damage the device.
  • At any point during a repair, if the adhesive becomes hard to separate, apply more heat.
  • After separating adhesive, keep the back panel, housing, and screen in close proximity until you disconnect all flex cables or other wire cables.

Samsung Galaxy S8 Teardown Steps

Click an image to enlarge

Heat up the device’s interior adhesive strips with a dehydrator, heat gun, or heat mat. Heat guns provide a quick solution but use caution as it can be easy to overdo it and damage the device.

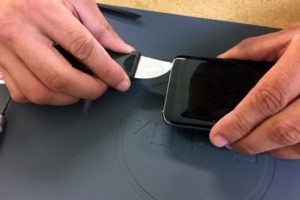
Use the metal spudger to slowly and carefully separate the back panel of the phone from the body. Start on the bottom edge of the device and proceed slowly.

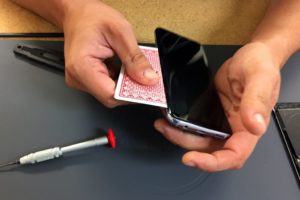
Continue using the metal spudger or use playing cards or guitar picks to gently separate the adhesive up the sides and top. Above all, don’t push too deeply towards the center of the device.

Disconnect the Sensor Cable

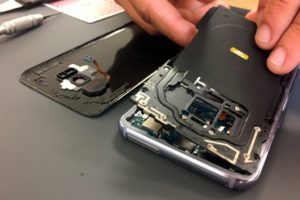
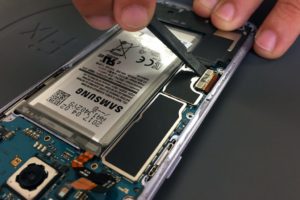
The rear fingerprint sensor connects to other components via an orange cable, so do not pull the back glass far from the frame. The cable can be disconnected from the back panel with a spudger.

Now you’ve disconnected the fingerprint sensor cable and separated the adhesive on all edges. After that, the back panel can be removed and set to the side.

Unscrew visible screw heads starting from the top. These connect the wireless charging assembly to the body. The three screws along the bottom do not require removal.

Galaxy S8 Screen removal step 5

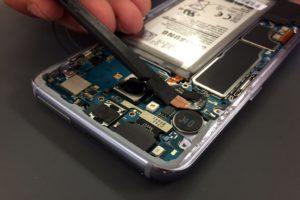
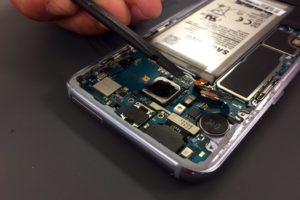
Set aside the wireless charging assembly. Using the spudger, disconnect the battery’s orange-colored flex cable which is connected to the logic board.

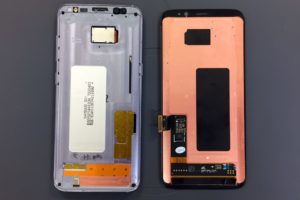
The screen connects to the board by an orange flex cable located near the edge of the phone. Disconnect it using a spudger.

Separating the Galaxy S8 Screen Adhesive

Removal of the Galaxy S8 screen may require reheating the adhesive. Slide the metal spudger between the screen and body. Gently slide along the bottom of the device, separating the adhesive.  WARNING: Be careful not to damage the flex cable on the right side of the phone. Do not pry too deeply into the device on the bottom or right side.

A plastic card can be used to separate the adhesive on the sides and top of the phone. However, you will have to angle the card to slide up the sides of the phone because of the glass curvature.

Watch that Flex Cable!

The screen’s flex cable feeds through a hole in the right side of the body (if you are looking at the screen). Take care when pulling the screen away from the body because there can be complications from rushing. For instance, the flex cable can get caught on the edge of the opening.

That’s it! You’ve removed the Samsung Galaxy S8 screen assembly. In conclusion, we hope you’ve learned something and had fun. You can do the removal steps in reverse if you are attempting to install a new screen assembly.

For Help, Repairs, or Parts

If you need parts or tools for this repair, or if this repair is too much to attempt on your own and you need a repair professional skilled at Samsung Galaxy S8 repair, contact iFixYouri at 888-494-4349 or www.ifixyouri.com.

MacBook Buyer Beware

Stunned by the Touch Bar on the new MacBook Pro? Thinking about buying one for yourself or a loved one? Don’t rely on the only hit to your wallet being just the exorbitant one upfront.

2016-macbook-pro-ports

iFixit, a website known for their “teardowns” of new electronics, just released their dismantling of the 15″ MacBook Pro. This model, along with the 13″, scored a 1 out of 10 on their scale of “repairability.” Issues brought up included direct soldering of the RAM to the logic board and the proprietary solid-state drive. Upgrading your performance or storage is practically impossible, so you’ll want to be sure to buy the model with the optimum specs for your daily use. Also, the newfangled Touch Bar is stunningly easy to break during repair, being held down by a ridiculous amount of glue (iFixit’s experienced teardown techs accidentally destroyed it on both builds). The power button also doubles as a Touch ID sensor, and is thus connected directly to the logic board; this might mean that swapping out a faulty power button will require replacing the logic board (!).

repairability

If a MacBook Pro is in your buying future, we strongly recommend purchasing an AppleCare plan with it. While it seems pricey ($349 for the 15″ MBP) it’ll definitely pay off if something goes wrong. iFixYouri is currently in talks with suppliers about parts for the new models, but we can tell you right now that they won’t be cheap to repair. Save yourself a lot of money and a huge headache by thinking ahead of time. The total price goes up to $2,750 (before dongles) but if you can comfortably pass the $2,000 mark for a laptop, you shouldn’t be worrying much.

If you own a current or older model of MacBook Pro, and your screen is giving you issues or battery life isn’t what it used to be, give us a call. iFixYouri does all sort of repairs for Apple laptops, from one Air to seventy Retina MacBooks for corporate clients, with quick turnaround and excellent customer service.

iPhone Water Damage Repair for White iPhone 4

In efforts to show people the best way to save an iPhone 4 from death after water damage, we have decide to drop a custom white iPhone 4 in water and repair it. We offer the white iPhone 4 conversion service for anyone who is interested.


Steps to take:

As we told you in our last iPhone water damage video, make sure the iPhone is powered off. If you get a white pinwheel on the screen and it won’t turn of, you hold down the power button and home button until it turns off.

Next you remove the back cover by removing the 2 screws at the bottom of the iPhone 4 to expose the internals.

11 screws total hold the board in the housing.

Be sure to remove the SIM card tray.

Let sit for 24-48 hours before reassembling.

Hopefully your DIY iPhone repair goes smoothly. If you have questions or professionals helping to insure the safety of your phone, give us a call.


Our iPhone water damage success rate is better than the competition because of our process to reduce the amount of corrosion. Some business may claim a high rate of success but we know that in addition to our quality parts, it is through our system that your iPhone 4 has the best chance of survival.

The main thing is to dry your iPhone as quickly as possible.

iFixYouri’s iPhone water damage repair service has a 90% success rate at fully repairing your water damaged iPhone. We lead the industry in liquid damage with our state of the art equipment, processes, and procedures that will get your phone back to working condition.  From phones going in the washing machine to swimming in the ocean, we have you covered. Select your model iPhone below to begin the repair process.

iPhone 4 Water Damage Repair


iPhone 3Gs Water Damage Repair


iPhone 3G Water Damage Repair

iPhone 3G Screen Damage Drop Test with Case

We decided to drop the iPhone 3G to test the damage to the glass screen and LCD, which our common causes for repair even with protective cases like we use here. An iPhone 3G repair is one of our most common fixes, LCD screen replacement services just about topping the list.

As you see in the video below, it took 5 drops to insure that the LCD was dead. Things were not looking to good early and after the 4th drop LCD failure seemed inevitable. The glass did not shatter, surprisingly enough. The case probably absorbed the impact when hitting the ground. If it weren’t for the case, this drop would have almost been a glass and LCD repair.

When looking at DIY repair for the iPhone 3G, the LCD display can be difficult to those unfamiliar with fixes of this nature. As this test demonstrates, just because the screen does not break does not mean there is not LCD damage, and vice versa.

Comparative Tests

In addition to this iPhone 3G drop test, we performed an iPhone 3Gs break test with a protective cover and it produced similar results (6 drops LCD damage). Our iPhone 4 bumper drop test resulted in broken glass and with the i4 this means the LCD will need replaced as well. The new design glues the LCD and glass together.

How do you think the iPhone 3G performs with a protective case?

Our iPhone repair technicians are trained to help both repair broken iPhones and help those looking for DIY repair solutions. Let us know if you have any questions, as it is our goal to provide customers with the best decisions possible.  Often times we get calls from customers who have ordered a wrong iPhone parts or made a broken iPhone worse.  Don’t let it happen to you and call now!

iPhone 4 Breaks in Drop Test, Not Just Parts – VIDEO

About a week ago a few of the techs and I decided to drop test an iPhone 4 to test screen damage resistance (we had a full iPhone, minus the motherboard). This test came under scrutiny since there was no ‘video’ proof and the iPhone parts used were questioned. We did not use any hammers, ice picks, or axes to break it. Just gravity. We did not throw it or spike it.

We told everyone that once we have a full iPhone, functioning, we’d be posting a video of us drop testing. The test was completed on a sunny afternoon in Florida, behind our repair facility. The area where it was dropped was free of pebbles and/or small rocks. It was a flat surface out in our parking lot. The height it was performed at, was about the level where you would be holding the phone out in front of you.

Well, the day has come, we have a complete working iPhone, straight from Apple, in our hands today. We disassembled it, took some pictures, reassembled it, showed that it works and that it is a functioning iPhone in the video. This video is completely unedited. What you are about to see is heart breaking. Our next step will be to perform and iPhone repair to show how we can clean up a broken iPhone 4 screen when suffering glass damage.

****WARNING – THE VIDEO YOU ARE ABOUT TO VIEW CONTAINS SOME GRAPHIC SCENES. IT IS NOT FOR THE FAINT OF HEART*****

Tearing down the new iPhone 4 – an exclusive look on the inside

All the hype going on right now is about the new iPhone 4, all the great new features, and Apple raising the bar a notch to its competition.

We received our FULL, circuit board included, iPhone 4 quite early this morning and rather than playing with all the new features, we tore it down to its bare components. How it comes apart and gets put back together is determines the iPhone repair process and that’s what really excites us.

First thing we noticed is how solid it felt. It feels heavier, and definitely more durable (feels is the key word here).

Taking the back cover off reveals a battery, like most other phones on the market today. This battery actually comes out with ease. The iPhone 4 is manufactured in a way that is opposite of the 3G, and 3Gs, but similar to the original 2G iPhone. Let me explain what I mean here….

iPhone 2G/iPhone 4 – In the manufacturing process, the Glass is the first part that is assembled to the chassis/frame, followed by the internals, and last the battery then the back cover.

iPhone 3G/iPhone 3Gs – The back cover is the first part assembled, then battery followed by the internals. The glass is the last part that goes in.

With iPhone 4 Repair for screen damage, this makes the process a bit more difficult, time consuming, and costly as the iPhone needs to be completely torn down to change out the glass.

After removing the battery we moved on to other iPhone 4 parts, we removed the lower speaker, charging port, and gently removed the logic board. With the logic board removed, you have access to the cameras, power button, ear piece speaker, volume controls and all the screws that hold the screen in place. Once all the screws are removed, the glass has a bit of adhessive that holds the screen to the frame snuggly.

The frame is a piece to marvel at. The intricate design and how everything pieces together is quite amazing.

In addition to the manufacturing of the phone gearing back towards the ways of the original iPhone, Apple decided to go ahead and use a mass amount of new screws that we have not seen before. As if the tiny screws that were used before weren’t pain enough, now they threw in some washers that help in holding the glass in place.

The steel body, combined with the sleek glass on front and back, we’d say that Apple hit yet another home run with this one.

Repairs on this new phone should not be left to amateurs. The mass of new screws, connectors, odd shaped circuit board(to maximize real estate), make this a tricky repair. Any and all measures to prevent electrostatic discharge(ESD) should be taken when cracking this open. Our technicians are always grounded when working on phones, and are only permitted to work in ESD safe areas.