Category Archives: smartphones

iPhone 7 Screen Repair: How To Do It Yourself

iPhone 7 screen repair can be accomplished smoothly if you take your time and have the correct tools and equipment.

Tools Needed:

Recommended: Magnetic Mat [BUY NOW],
Screw Capsules [BUY NOW]

Parts Needed:

General Repair Guidelines:

  • Always use good lighting. Smart device components, for instance, are small. You’ll need plenty of light to see
    what you are doing.
  • Maintain a clean,
    organized workspace
    . This prevents losing or confusing any components.
  • Group your screws so you can keep track of where they came from. Most screws cannot be interchanged.
  • Apply enough heat to loosen adhesive. However, take care not to overdo it and damage the device.
  • At any point, if the adhesive becomes hard to separate, apply more heat.
  • After separating adhesive, keep the housing and screen in close proximity until flex cable is disconnected.

Introduction

iPhone 7 screen repair is moderate in difficulty. Several flex cables can be torn easily. Above all, use caution. For
instance, loosening the adhesive that keeps the screen sealed to the body requires properly heating them with a
dehydrator or heat gun. Let’s get to it!

iPhone 7 Screen Repair Step by Step

Before beginning, heat up the device’s interior adhesive strips with a dehydrator, heat gun, or heat mat. Heat guns are
the quickest. However, use caution. It can be easy to overdo it and damage the device.

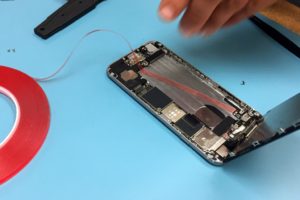
Open the iPhone 7

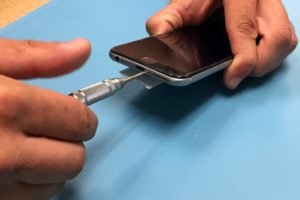
  1. Unscrew the two pentalobe screws on the bottom edge of the phone on either side of the lightning port.
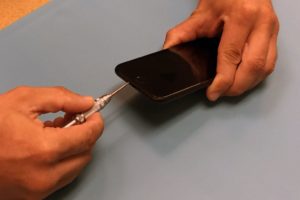
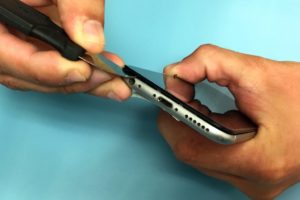
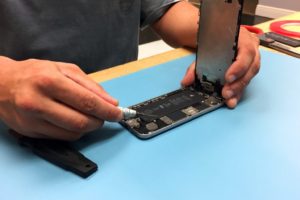
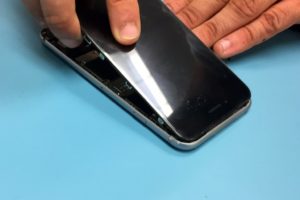
  2. Use the metal spudger to slowly and carefully separate the screen of the iPhone from the body. Start on the bottom
    edge of the device and proceed slowly.
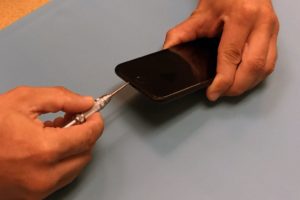
  3. Continue using the metal spudger or use playing cards or guitar picks to gently separate the adhesive up the sides
    and top. Don’t push too deeply towards the center of the device.
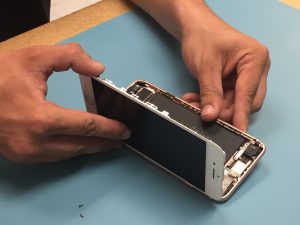
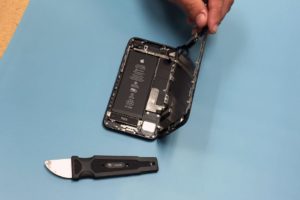
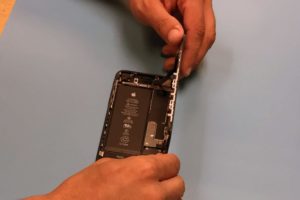
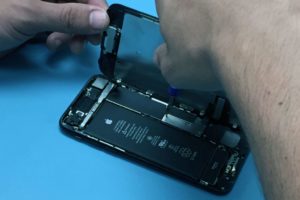
  4. The left side of the screen will open off the body; like a book opened from the back cover. The flex cable
    connecting the screen to the battery will still be attached so open it carefully.
Disconnect the Cables

  1. A silver EMI shield on the mid-right side of the phone needs to be removed. It is held in place by four tri-point
    screws.
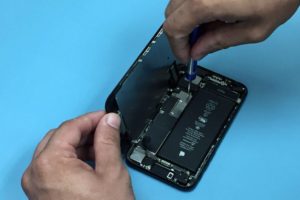
  2. After removing the shield, use a spudger to disconnect the battery from the logic board.
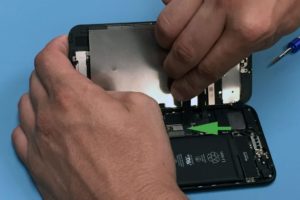
  3. Use the spudger to disconnect the display connector flex cable.
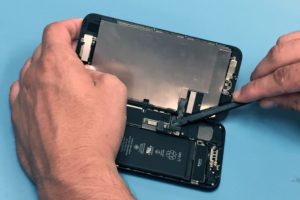
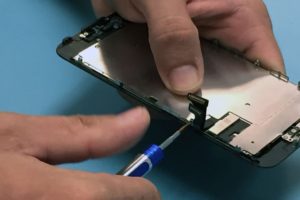
  4. Remove the two Philips head screws on the shield over the front panel sensor assembly connector. It is the silver
    shield near the top of the phone with the flex cable coming out of the bottom.
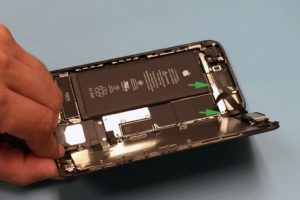
  5. With your spudger, disconnect the black front panel sensor assembly connector cable from the logic board. It is
    the one that connects the screen to the body.
  6. You can now remove the LCD assembly of the iPhone 7 from the body.
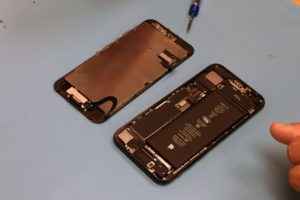
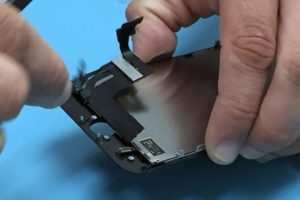
Remove the Front Camera and Earpiece

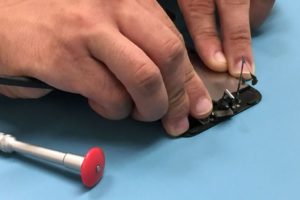
  1. Next, we will remove the three Phillips head screws that hold the silver earpiece bracket on the top of the LCD
    assembly.
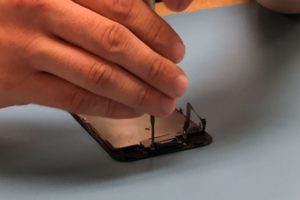
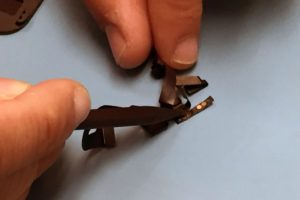
  2. Pull the front camera up and out of the way with your spudger or tweezers. Remove the two Phillips head screws
    attached to the earpiece speaker. You can now also remove the earpiece speaker.
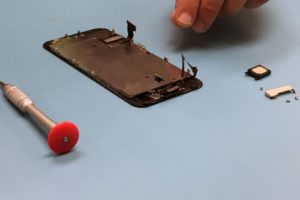
  3. Use your spudger to remove the ambient light sensor and proximity sensor. This is a thin cable that is easy to
    tear so use caution.
Remove the Touch ID/Home Button

NOTE: The touch ID must be removed carefully. Failing to remove it safely or breaking it will require visiting
an Apple store.
The touch ID must be removed carefully. Failing to remove it safely or breaking it will
require visiting an
Apple store.

  1. Remove the four pentalobe screws holding the touch ID/home button bracket.
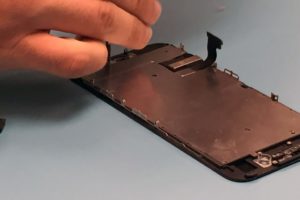
  2. Work your way around the side brackets on the both sides of the assembly, unscrewing all 6 tri-point screws.
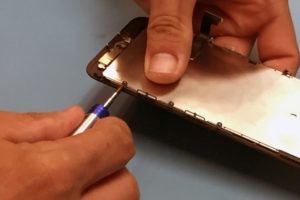
  3. Peel the large LCD shield away, starting from the top.
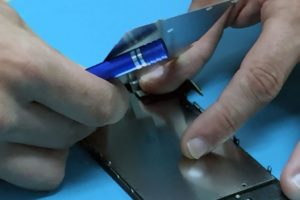
  4. Use your spudger to disconnect the home button cable connector.
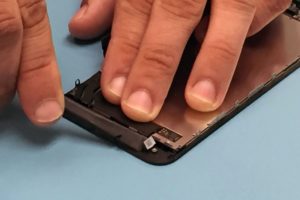
  5. Disconnect the underlying connection with caution.
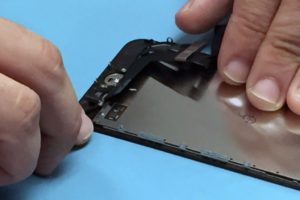
  6. Pry the adhesive holding the touch ID/home button to the back of the digitizer.
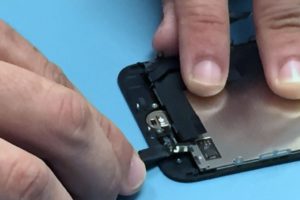
  7. The home button is now unattached and can be removed but pushing it forward through the front of the screen.
For Help, Repairs, or Parts

For iPhone 7 Replacement Parts, or if iPhone 7 screen repair
is too much to attempt on your own and you need a repair professional skilled at iPhone
7 Repair
,
contact iFixYouri at 888-494-4349 or www.ifixyouri.com.

iPhone 6 Battery Replacement: How To Guide

Introduction

iPhone 6 Battery replacement is relatively easy. The clasps holding the screen onto the body near the top are at an
angle. The flex cable for the screen is also towards the top but you will not need to disconnect it to replace the
battery.

There are two strips of white adhesive under the battery that are a nuisance to remove but it is much harder to try to
pry the battery out without doing so. Let’s do this.

Exercise caution when working with batteries, especially swollen
ones
.

Tools Needed

  • Metal Spudger [BUY]
  • Pentalobe Screwdriver #000 [BUY]
  • Spudger [BUY]
  • Tweezers [BUY]
  • Tape [BUY]

Recommended: Magnetic mat [BUY],
screw capsules [BUY]

Parts Needed

iPhone 6 Replacement Battery [BUY]

General Repair Guidelines:

  • Always use good lighting – smart device components are small and you’ll need plenty of light to see what you
    are doing.
  • Maintain a clean, organized workspace so you don’t lose or confuse any components.
  • After separation, keep the back housing and screen in close proximity until all flex cables or other wire
    cables are disconnected.

iPhone 6 Battery Removal Steps

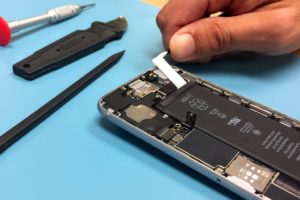
  1. Unscrew the two pentalobe screws on either side of the lightning dock on the bottom edge of the iPhone 6.

2. Use the metal spudger to slowly and carefully separate the glass screen of the iPhone from the body. Start on
the bottom edge of the device and proceed slowly. The flex cable for the screen is at the top.

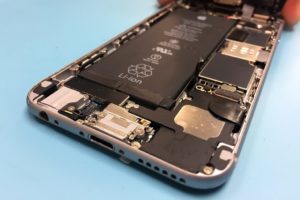
3. Slowly pull the top of the screen away from the body and locate the EMI (electro magnetic interference) shield
located by the bottom right of the battery.

  1. Unscrew the two screws securing the EMI shield to the logic board and remove it.

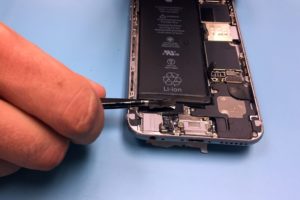
  1. Using a spudger, disconnect the battery cable from the logic board.

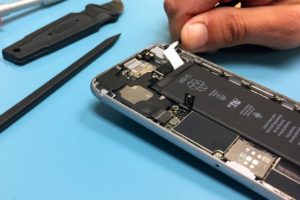
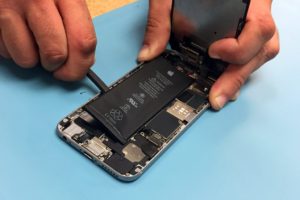
  1. The next steps involve removing the adhesive tape underneath the battery to make it easier to remove. Slide one
    tip of your tweezers under the black adhesive strip at the bottom of the battery. Each black strip runs halfway
    across the bottom of the battery.

  2. Now roll your tweezers away from the battery while simultaneously pulling the tape out from underneath the
    battery.

  3. Continue to pull the tape out from underneath the battery and roll it around the tweezers. It may help to pull
    diagonally out from the corner as the tape runs up the full height of the battery.

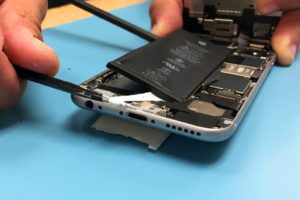
  4. If the white tape snaps apart you may need to use a spudger to carefully pry the battery up. Continue using a
    combination of tweezers and the spudger to separate the battery from the body of the iPhone. You will have to
    repeat the process to remove the second strip of tape.

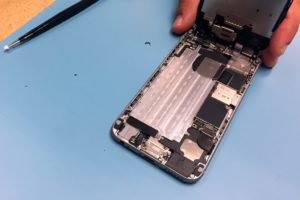
  5. Now you can remove the battery. Use a small length of some adhesive tape to secure the new battery in place.
    Reconnect the battery cable to the motherboard and screw the EMI shield back on.

  1. Reattach the screen by angling the top in first and then clicking the side clasps into place. Replace the two
    screws by the lightning dock. That’s it! You’re done.

For iPhone 6 Battery Help, Repairs, or Parts

If you need parts or tools for this repair, or if this repair is too much to attempt on your own and you need
professional help with your iPhone 6 repair,
contact iFixYouri at 888-494-4349or www.ifixyouri.com.

What to Do if You Drop Your iPhone 7 in Water?

Water damage is not a death sentence to an iPhone. Chances are we’ve all experienced it. We drop our precious phone in some sort of liquid. We jump in the pool with our phones in our pockets. We drop it in the toilet. We spill a beer on it. Inevitably something happens.

Being that water damage repair is one of our specialties, we are asked this question a lot, dozens upon dozens of times per day. While the new iPhone 7 is not completely waterproof, it is fairly water resistant. With the help of some adhesive sealing the screen, some rubber gaskets around certain components, and some tweaks in the design, the chances of needing an iphone 7 water damage repair are lower than previous versions. This does not mean that you should try to push the phone to its breaking point and it certainly does not mean it’s immune to water damage. Something as simple as having your phone in the bathroom while you take a hot shower can cause problems.

First Steps After Dropping an iPhone 7 in Water

The process is quite straight forward and taking quick action can help decrease your chances of failure, and increase your chances of having a good, working device. This will work on other devices as well, but since we’re talking iPhone 7’s here, we’ll use this as our main example.

STEP 1) Turn Off the Device

First and foremost, turn off the device, and if it’s a model phone where you can easily remove the battery, do so. It is highly likely that your phone will work after you pull it from the water. The number one killer of water damaged phones isn’t actually the water, it’s the current that travels through the logic board after it gets wet. When you cross electricity with water, a short will occur.

iPhone 7 Power Button

STEP 2) Open All Covers and Ports

For an iPhone 7, pop out the SIM card tray by inserting the end of a paper clip in the small hole on the right side of your phone, take off any case, do not plug it in. You want to make sure if water has gotten in, that there is a way for the water to get out. You don’t want the liquid to be trapped inside if at all possible.

iPhone 7 SIM Card Removal

STEP 3) Dry Out Your Phone

We don’t advise to shake the phone, as this can cause water to get deeper into the board. Instead, we recommend using some sort of desiccant. You want something that will draw the water out. A shop vac is an okay application. Silica gel is ideal. A dehumidifier works wonders. A container of Damprid from Home Depot can also do the trick and will only run you about $10.

Steer clear of using anything that generates an excessive amount of heat, as this can only further damage the device. Do not place your phone in an oven or toaster. This is all around a bad idea.

A combo of Damprid, somewhere with good air circulation, and opening your device as much as possible will be your best chance of survival.

What do you do after your iPhone has been soaked?

After you complete the simple steps above, you need to wait. Do not try to power your phone on in any time less than 36 hours. It’s super important that your phone is completely dry before any attempt is made. If after 36 hours you see any liquid, do not try to power it on, you’ll just have to wait a bit longer. Let that Damprid soak up any liquid.

When you are confident any liquid that the device may have come in contact with is dry, then and only then try to power it up. If you get no power initially, it may need a good charge. Try giving it a short charge. If you don’t notice anything light up on the screen, chances are your battery may be shot, and possibly other components.

At this point, you may need to bring your phone to a repair shop or use a mail-in service for deeper diagnostics and help. iFixYouri has a no-fix, no-fee policy. We offer free round trip shipping on all services, including all of our iPhone 7 Repair Services.

Regardless of the state of the device, we recommend a good cleaning by a professional repair service after your device has been wet. Water can leave residual minerals and build-up on the components, which should be removed to ensure longevity and good functionality.

What should you do with a device that can’t be repaired?

In the event that iFixYouri cannot fix your device, there are options. The device can be sent back to you. It can be recycled (if it carries no value), or if it’s a relatively newer model (iPhone 5 or higher), you can sell your iphone and use the money you earned to purchase a new device.

We know how frustrating water damage can be. We see it every day. By taking the correct steps immediately after it happens, you can dramatically increase your odds of having a good, working phone again.

If you have any questions or need professional help for iPhone 7 Repairs, feel free to reach out to us at iFixYouri.com, or call us at 888-494-4349.

iPhone SE Specs – As Far As We Know

The iPhone SE is rumored to be the next Apple phone, probably announced on March 21, 2016 at Apple’s press conference. Details on how to view that are towards the bottom. The iPhone SE will be a smaller frame like the iPhone 5s, but contain more powerful processing like the 6s and 6s Plus. Here’s what we’ve learned so far about the iPhone SE Specs:

Design and Dimensions

  • Almost identical to the iPhone 5s
  • Edges – less shiny, maybe slightly curved

Processor Specs

  • Apple A9 chipset (same as 6s and 6s Plus)
  • M9 motion co-processor allows “Hey Siri” to be always on
  • NFC (near field communication) chip, which allows Apple Pay

Cameras & Video

  • Same cameras as iPhone 6s – 12mp iSight rear camera
  • 4k video
  • Live Photos
  • BUT No 3d touch

Storage Capacity (two options)

  • 16gb
  • 64gb

Color Options

  • Space gray
  • Rose Gold
  • Silver

Starting price is rumored to be $450.


iPhone SE Specs - Colors

Other rumored announcements at the upcoming Apple Event besides the iPhone SE include a smaller 9.7-inch version of the iPad Pro which has an Apple designed keyboard cover and Pencil stylus as well as some new bands for the Apple Watch.


How to Watch the March 21 Apple Event

There are several options available for those who would like to watch the announcements that Apple makes at the live event. And yes, iFixYouri will be offering services for iPhone SE Repair.


Sources:

9to5mac.com
vr-zone.com
slashgear.com
valuewalk.com


iPhone 6s Rear Camera Comparison vs. iPhone 6, 5s, 5, 4s, 3gs

For our iPhone 6s Rear Camera Comparison, we took the same photo (of some lovely little friends) with the same lighting from the same distance with several generations of iPhone (the 3gs, 4s, 5, 5s, 6, and the new iPhone 6s). Here’s how they came out – compare the results for yourself. Also, for a rundown of the comparative iPhone camera specs, scroll below the photos.

It is easy to notice the reduced vibrance and sharpness in the 3gs photo. There is a general noticeable increase in image quality as the generations progress, although it should be noted that the 4s, 5 and 5s share the same 8 megapixel camera. The iPhone 6s phone does really shine among the group, which, for me, seems to be most evident in the face of the troll.

iPhone 3gs
iPhone 3gs
iPhone 4s Photo
iPhone 4s Photo
iPhone 5 Photo
iPhone 5 Photo
iPhone 5s Photo
iPhone 5s Photo
iPhone 6 Photo
iPhone 6 Photo
iPhone 6s photo
iPhone 6s photo

iPhone 6s Camera Specs

  • 12-megapixel iSight camera with 1.22µ pixels
  • Improved local tone mapping
  • Improved noise reduction

iPhone 6 Camera Specs

  • 8-megapixel iSight camera with 1.5µ pixels
  • Improved local tone mapping
  • Improved noise reduction

iPhone 5s Camera Specs

  • 8-megapixel iSight camera with 1.5µ pixels
  • Local tone mapping
  • Noise reduction


iPhone 6s & iPhone 6s Plus Announced at Apple Event

iphone 6s & iphone 6s plus

The newest Apple iPhone models were announced at the live Apple Event today. Here is a summary of the covered features.

Available iPhone 6s Colors

The new 6s and 6s Plus will be available in the following colors:

  • Silver
  • Gold
  • Space gray
  • Rose gold


apple iphone 6s 3d touch


Apple iPhone 6s 3D Touch

Apple’s 3D Touch technology will allow the phone to tell the difference between light, medium, and hard taps – which will enable new dimensions to app and OS functionality. For example, within emails you will be able to hard press to preview emails. Addresses texted to you can be previewed by pressing. Then you may continue holding to enter full-screen.


Apple Live Photos

The internet has already dubbed the Apple Live Photos feature as “Harry Potter-like”. For those unfamiliar with the books and films, this means that all photos will become… well, moving. They can be tapped to view a 4 second moving video… but it’s not a video or gif? Okay.

Also new is a 12 megapixel iSight camera. Check out the detail and color in the sample below (which is a screenshot from the Apple event, not an actual iphone 6s photo… we know, but you get the picture). There will be a flash on the front camera as well, which will be bumped up to 5 megapixels.

apple iphone 6s rear camera

apple iphone 6s 12mp camera


Apple iPhone 6s Docks

iphone 6s docks


So what do you think? Are these new features grabbing your i?

Pre-ordering is available for US customers on September 12, 2015.

Credit Card Processing, There’s An App For That

The introduction of the Smartphone has greatly increased the quality of access to many of our lives and no where has this point rang truer than in the world of small business. With the introduction of the various card processing systems for Smartphones such as Square and ROAMpay. The average small business owner now has the opportunity to accept credit card transaction and potentially widely increase their sales growth.

What Does This Mean for the Average Entrepreneur?

Obtaining a merchant account has not always been a easy task and for those just starting out in the open market the ability to offer alternative forms of payment, beside just cash transactions, can make all the difference. Whether the business be retail, culinary, artistic or other. Having an attachment for one’ s Smartphone (or in some cases iPad) for credit card processing alleviates the hassle of bulky point of sale terminals and worst yet, the old fashion “knuckle buster” manual imprinters. All in all presenting their customers with a smooth and convenient shopping experience which often results in repeat business.

Caring For Your Business By Caring For Your Smartphone

Having a Smartphone as a small business owner is a “no brainer” whether it be for credit card processing or simple day-to-day activities. Therefore, the protection and maintenance of such a vital tool is paramount. At iFixYouri, you can rest assured that if your Smartphone happened to be involved in an accident, be it water damage, a cracked screen or simple battery replacement issues, you are certainly in good hands. Because, when it comes to nurturing your business there’s no sense in faulty equipment stunting its growth.

How to Create App Folders on iPhones or iPads

iPhones and iPads are among the most advanced gadgets in the communication industry due to their ability to perform various tasks that are beyond human capabilities. These gadgets are created with a simple user interface so that they can be used by different people in the community to fulfill different tasks.

Create App Folders on iPhones or iPads

IPhones act as a storage device for various files and apps that may be of great importance to the user. Learning how to create app folders on iPhones or iPads gives you the chance to organize your programs for easy access whenever you need them.

Before you even start learning how to perform this task, the device should be operating on iOS 4.0 or later. This functionality makes it possible for iPads to store approximately 4,400 apps in its folders while on the other hand, iPhones can store over 2000 apps. Proper storage means that you can categorize the apps depending on the functionality, importance and how frequently you need them. Listed below are tips on how to create app folders on iPhones or iPads.

Step 1: Holding the App

You need to identify the exact app that should be transferred into the folder. Hold your finger on the app for some seconds until it shakes. This is also the same way to arrange different apps on your device.

Step 2: Dragging the App

After the selected app starts to shake, drag it on top of another. This will automatically create a new folder that contains both apps. You will also notice that a new folder has appeared during this process.

Step 3: Dragging More Apps

This stage is all about dragging the selected apps into the new folder that has just been created in the previous step. Such devices support thousands of apps and you do not have to worry about the possibility of the folder being filled up quickly. It is also good to arrange the apps by prioritizing the most important ones.

Step 4: Naming the Folder

After dragging all the necessary apps, it is now time to give the folder a suitable name. Also bear in mind that these folders are automatically given a name depending on the App Store category of the apps included in them. Feel free to select your desired name as you rename the new folders that have been created in your device.

What to do if You Experience Problems When Creating App Folders

Some users experience various difficulties when creating new folders for apps. This might even lead to serious mistakes that need specialized attention within the shortest time possible. But thanks to the presence of tech-savvy companies such as www.ifixyouri.com, you do not have to worry about the possibility of your device failing to operate again. These experts are always ready to fix iPhone or iPad related problems at cheap rates to help you save cash as they fix such errors.