Category Archives: iPhone

How to Recover Data From a Damaged iPhone


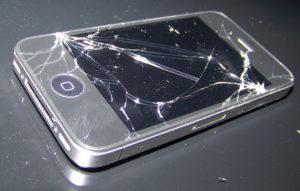
The mighty iPhone from Apple can also encounter errors which can lead to data loss, and subsequently, you will have to recover data lost on your damaged iphone. Physical damage due to accidental bumps as well can also lead to electronic failures.

Since smartphones have reached a level of sophistication where almost every detail can be stored and managed right on these devices, an iPhone user might be devastated to learn that their electronic data is not accessible. While iPhone backup services are available, these solutions may not be comprehensive in scope, especially when device failure issues are technical. Thus, professional iPhone repair services are ultimately needed.

Causes of iPhone Data Loss

How to Recover Data From a Damaged iPhoneData loss is something that can happen to any iPhone. There are various causes of iPhone data loss, listed below are some of the most common causes:

  • Accidental deletion
  • Accidental formatting
  • Data corruption
  • Computer viruses and malware
  • Malfunctioning mobile apps
  • Physical Damage
  • Normal wear and tear certainly puts limit on the longevity of any electronic gadget.

Why Recovering iPhone Data is Vital

As an Internet-enabled device, the iPhone allows for the efficient and convenient management of personal information including contacts, messages, schedules, pictures, videos, and other data of relative importance. In addition, the iPhone can also serve as an extension for managing finances, security keys, and other sensitive information through appropriate mobile applications.

For these reasons, there is often a dire need to recover data from the device. Stored data is often several times more valuable than the device itself, and more and more dependent users would pay a good price just to recover data.

Various Methods of iPhone Data Recovery

The first line of defense to recover data is by restoring backups. Through Apple iTunes, backups can be created offline by physically connecting the unit to the client computer via USB. However, not all Apple users would care about backing up the device because the process could take a certain number of hours depending on the amount of stored data.

More recently, an online backup through the Apple iCloud can also serve to recover data initially. The method of online backups is more accessible and thus gaining popularity among many users.

If backups are available, then the recovery process is almost straightforward. All the steps can be accomplished right from the user-friendly iPhone interface. But then again, restoring backups to recover data is not a comprehensive solution to a host of possible issues leading to data loss. Thus, professional repair services are further required.

Professional iPhone Repair Services

If the method of restoring backups fails, then the ultimate solution is to hire a professional iPhone repair service specializing in the repair of Smartphones including the Apple iPhone. Lost data due to human error, software malfunctions, or physical damage can be recovered with specialized tools that work right within the innards of the electronic gadget.

Low-level data recovery methods are effective in salvaging data from the solid-state drive integrated within the iPhone. Experienced data recovery professionals use a combination of software and hardware tools to access the internal operating system as well as to pry open the unit in case of physical damage.

Make iPhone Ringtones for Free in iTunes

free-iphone-ringtones-ifixyour

So you just bought an iPhone, and you want to buy a custom ringtone. Then you discover the songs are a buck each, and then another buck to make them into a ringtone on iTunes. If you want them for free, I’ll show you how to do it all within iTunes, no external program required.

Set Up for Free iPhone Ringtone

What to do first is to go into iTunes and pick a song. You can only pick a song that was not bought in the iTunes store. So either a song ripped from a CD, or that you find elsewhere on the internet.

Take the song, right-click on it and select “Get info”. Go down to the options menu and pick the start time and the stop time. Say the part of the song that you want to use for a ringtone is in the middle of it.  Indicate the start time for when the section of the song begins, and end it wherever you want. It doesn’t matter where it is in the song, as long as it lasts less than 40 seconds. Notice there are no dots in between minutes and seconds.

Now you’ve set when the song starts, and when it stops. If you were to play the song now that you’ve created a start and stop time, it will only last as long as the segment you indicated, even though the length of the song will still be the same. What you can do is right-click again, and choose “create AAC version”.  Create an AAC version and iTunes will create a copy of the song with the times that you have selected.

Fix Your Files

Next, go back to the song you’ve altered and undo the time changes you made in the options. That way, when you go back to listen to it later, it doesn’t just play the short clip you arranged.  Then take the short version for your ringtone to your desktop, and return to iTunes. Delete the short version from iTunes, so the copy isn’t taking up space in iTunes anymore.

Make the iPhone Ringtone

Next, go to the short track on your desktop, click on it, and change the name. Notice the format of the song is MPEG4 (‘M4A’ file extension). You’re just going to delete the A, to create an R, so the file’s extension would be .M4R instead of .M4A. If an alert comes up, confirm that you’re changing the extension.

Double-click on the song, and when it starts playing, it’s added in your ringtones automatically. Finally, on your iPhone, go to the ringtones section and sync it. Now your ringtone will be on it.

Adding personalized ringtones can make an old phone feel like new.  Before you purchase a new phone for fancy build-in ringtones, consider trying this simple method.  If your current phone isn’t performing properly, getting it fixed will also make it new.  Don’t take chances: leave iPhone repairs to the experts at iFixYouri.

How to Tether an iPhone: An Insightful Guide

 How to Tether an iPhone

iphone-tether-ifixyouriMobile telephone networks have progressed significantly ever since the introduction of the 1G network which came to first use in 1981. Today, urban areas are already enjoying the great benefits of mobile 3G networks powered by CDMA technology (code division multiple access). Theoretical speeds of up to 42 megabits per second are possible with this enhanced technology. Practically, a decent speed of about 7.2 megabits per second is commonly realized.

With this speed, mobile internet users can already stream high-definition videos from YouTube almost seamlessly (only 1 megabit per second is necessary, according to Google). As telecommunication companies are currently on the progress of laying out the framework for 4G networks, mobile internet communications will even be faster and more reliable. To maximize the use of this amazing internet speed, mobile users can tether their internet-connected smartphones so that other internet-capable devices such as laptops, iPods, and tablets can share with the connection.


The Convenience of Tethering

Sharing of an internet connection, referred to as tethering, can be done over wireless local area network (Wi-Fi), Bluetooth, or via a USB cable. When internet connection is shared over Wi-Fi, the tether device becomes the mobile hotspot. Depending on the Wi-Fi standard being used, internet-capable devices can connect from a distance as far as 10 meters.

An internet tether can also be done via Bluetooth; in which case, distance and speed may further be limited by the type of Bluetooth technology being used. Although a bit cumbersome due to the extra wire required, the tether can also be established via the USB cable that connects to the USB ports of the tether devices.

Of all the possible connections, sharing the internet over the Wi-Fi network is the most popular because of network speed and reach. Furthermore, multiple devices can connect to the mobile hotspot simultaneously. The number of devices that can effectively connect to the hotspot is only limited to the established speed of the mobile 3G or 4G networks. If connection speed can reach about 1 megabit per second, then three devices can connect simultaneously without noticeable decrease in internet speed. If you can manage to get strong networks, reaching the speeds of about 7.2 megabits per second, you could get a dozen devices to simultaneously connect.


Step-by-Step Method for Tethering the iPhone

The iPhone, known for the restrictive nature of its company, has been in a consistent battle over allowing tether or not.

While Apple allowed the tether in the iPhone 3G through the iOS 3.0, succeeding updates of the mobile operating system removed the feature due to fair use policy restrictions. However, jailbroken iPhones were able to retain the feature. Due to popular demand, Apple reinstated the mobile hotspot feature in the iOS 5 mobile operating system.

In an iPhone 5 running the latest iOS, turning the mobile hotspot feature on is very easy.

Find the Option

iphone-tether-ifixyouri-3On the Settings menu, the Personal Hotspot submenu is accessible if the shareable 3G network is available. The Personal Hotspot feature is dependent on the kind of SIM card provided by the service provider.

Prior to accessing the Personal Hotspot submenu, the General Network settings must be checked for 3G and cellular data configurations. Both of these network settings must be turned on; 3G helps in loading data faster while cellular data allows the iPhone to access internet data via the cellular network.

If you don’t see any of the options, check this page to see if you have the minimum technical specs required.

Configuration

When the General Network settings are properly configured, the iPhone should already have mobile internet connection and this internet data access can be shared by sliding the Personal Hotspot option to the on-state.

Below the Personal Hotspot configuration, internet connectivity can be shared via Wi-Fi, Bluetooth, or USB tether. For wireless connections including Wi-Fi and Bluetooth, wireless security must be activated by setting up a password.

The older versions of the iPhone including the iPhone 4 and 4s and 3GS are compatible with iOS 5+; thus, these iPhone versions follow the same method as the iPhone 5 for internet tether. The original iPhone and its immediate successor, the iPhone 3G, may need certain hacks to enable the tether since these no longer supported in iOS 5+. Nonetheless, the slow cellular connectivity of the original iPhone and the iPhone 3G may not be worth the trouble of enabling the tether on these devices.


Connecting to the Access Point

Connecting to the iPhone tether is as easy as connecting to any Wi-Fi network.

1) On a Windows or Mac computer, connecting to the iPhone hotspot begins with searching nearby wireless networks.

2) When the iPhone mobile hotspot is active, the name of the iPhone is shown on the list. Upon clicking the correct option, the user is prompted to enter the Wi-Fi password previously set up.

3) The connecting device then obtains the IP address and automatically performs other wireless configurations for the tether.

That’s all there is too it!

The ability to tether can bring new life into how you use your devices.  If you have either an iPhone or a computer that you want to use for this process, but one (or both) is in need of repair, get it fixed at iFixYouri so you can enjoy the benefits of tethering.

Beware of Data Charges

REMEMBER: Data charges apply for the tether. Since the laptop and other larger devices can consume data really fast, data consumption related to the tether could easily go overboard. To avoid outrageous cellular bills, it is important to check with the telecom company for unlimited data plans pegged at a fixed rate per month.