Category Archives: Repair

Repair

Phone Etiquette Dos and Don’ts to Practice and Avoid

Naturally, your language will differ depending on who you are on the phone with. You may use casual language with your friends and family, endearing language with your spouse, and professional language with your boss. Unlike with your friends or spouse, you must maintain professional language and use phone etiquette at all times when in your workplace. Here is a rundown of phone etiquette dos and don’ts, especially if your job requires you to always be on the phone. 

Phone Etiquette Dos 

Proper phone etiquette is important because it allows the person on the other side of the call to build their trust with you and become receptive to what you are saying. 

Answer Calls As Soon As Possible 

Obviously, one of the most important ways to practice phone etiquette at work is by answering the phone. There is no excuse for you to not answer a phone call within three rings if the phone is sitting on your desk or you are not on a lunch break. 

The person who is calling for assistance may become impatient, hang up, and not call back. This turns into a missed opportunity for you and your company as well as the customer. 

In the case that you are never able to hear when your phone rings, your phone may have a broken loudspeaker

Speak Clearly and Use Appropriate Volume 

Be mindful that the only way for you to make a first impression on the phone with a customer is with your voice. This is why speaking clearly and using appropriate volume is important. 

Not only does speaking clearly save you from having to repeat yourself, but it also helps you avoid saying something that can easily be misinterpreted or misheard. 

You should also be mindful of your tone of voice and the volume in which you are speaking to a customer. One way to ensure you do this is by smiling as you speak because it is proven to make your voice sound brighter and more inviting. So even if you are not having the best workday, it won’t affect your interaction with customers. 

If you are practicing this, yet still are not able to communicate clearly, it may be because your phone has a broken mic. Your mic may actually only be picking up every other word you say! 

Actively Listen and Take Notes When Needed 

The customer on the phone must know they have your attention and are being listened to. To prove that you are listening, it is important that you repeating the key points they make and occasionally interject a “yes” or “mhm.” 

If your phone’s ear speaker is not working, it will be difficult for you to be a good active listener, and the customer may be led to believe that they are being ignored. 

 Phone Etiquette Don’ts 

To simply put it, you should never disrespect a customer you are on a call with, whether you agree with what they have to say or not. And sometimes it is hard to tell that you are being disrespectful in the first place. 

You Should Avoid:

  • Interrupting a customer when they are speaking. 
  • Ignoring a customer’s question, even if you don’t know the answer. 
  • Talking down to a customer. 
  • Purposefully hanging up on a customer. 

In any case that the poor quality of your phone is affecting your quality of service, you should turn to a tech repair company such as iFixYouri, where repair experts will fix your phone’s flaws for an affordable price.

Phone Etiquette Dos and Don’ts By iFixYouri 

Photo Credit: Berkeley Communications

4 Common Laptop Issues and How To Fix Them

It seems as if your laptop decides to fail you when you need it the most. The most unfortunate part of it all is not knowing how to fix the issue yourself. To avoid this, here are 4 common laptop issues and how to fix them.

Your Laptop Won’t Turn On 

There is likely one of three reasons as to why your laptop refuses to turn on even after being charged. The issue is your laptop may not be charging in the first place.

The first reason why your laptop may not turn on is because of a failed AC Adapter, or the brick you connect to the charging cable.

To test if the AC Adapter has an electricity output, use a voltmeter to properly inspect. In the case that it does not have electricity, test another adapter to be sure and replace yours. They are often under $100. 

If you constantly have to adjust your laptop’s cord to get it to charge, the issue is most likely the DC Jack.

In some cases, the DC Jack does allow power to get through, but a sudden move can change that. Other times, it is just completely broken. The only solution is to replace the DC Jack. 

 The third and typically most expensive cause of your laptop not turning on is a broken motherboard. The only option is to replace the motherboard or buy a new laptop. 

Your Laptop Keeps Collapsing 

For a laptop screen to be seen properly, it must be supported upright. If your laptop screen is not supported and keeps folding in or falling back, your laptop has damaged hinges or housing in general. 

If you are tired of propping your screen against the wall, it is time to get your laptop’s hinges and housing repaired. There are cheap kits online, but if you want the best result and a long-lasting result, you should have your laptop repaired by an expert tech shop. 

Your Laptop Screen Goes Blank

When first powering your laptop, there is often a brief moment when all you can see is your reflection on the screen- but eventually, your apps appear. 

If your laptop screen remains black or suddenly goes black in the middle of using it even though you see lights and hear the fan, there is probably a memory issue. 

Make sure to check the memory modules are in contact with the slot. If this doesn’t result in anything, remove the modules and test one module at a time to see which one allows the laptop to turn on. All you have to do is replace the broken module. 

The other reason why your screen is blank goes back to having to repair the motherboard. 

Your Laptop Keeps Overheating  

If the bottom of your laptop easily burns you or warms up any surface that it is on, your laptop is overheating. The good thing is that preventing your laptop from overheating is simple and can be done at home. 

  1. Place your laptop on an elevated surface: Elevating your laptop will allow it to ventilate and distribute the heat properly. 
  2. Control Fan Speeds: There are several apps you can download on your laptop to control fan speeds. If your fan runs fast, your computer will think that the CPU is overworking and will begin to overheat. 
  3. Keep your laptop in a cool setting: Make sure your laptop is not in direct sunlight or else it will cause your laptop to overheat quickly. 

If you are not quite sure what is wrong with your laptop, you can send your laptop to iFixYouri for a free diagnostic test. Tech experts will thoroughly examine your device and then give you a proper diagnosis. No matter what you need to get done to your laptop, iFixYouri can repair it for a very affordable price.


4 Common Laptop Issues and How To Fix Them By iFixYouri

Four Unusual Keyboard Shortcuts You Didn’t Mean to Hit

Modern keyboards have a total of 104 keys, meaning that there are hundreds of combinations that can result in a shortcut. Each shortcut serves a specific purpose but may seem bothersome in the times you don’t need them. With this being said, here are four unusual keyboard shortcuts you didn’t mean to hit. 
Everything You Type Erases One Letter at a Time 

Typing is the most basic function of a keyboard but it becomes an annoying task when what you have already typed is erased.  

This issue is happening because you have accidentally hit the Insert key. The insert key has two modes- insert and overwrite. 

You are used to the insert mode, which allows you to type one letter after the other without any conflict.

The overwrite mode is what causes your typing to overlap. 

To fix this keyboard issue, simply hit the insert button again. 

What is the purpose? 

The insert key does not serve a big purpose on the keyboard anymore. Unless you want to rewrite something you have already typed, the overwrite mode is only useful for pasting something (Shift + Insert). Even this shortcut could be argued because the more common way to paste something is Ctrl + V

Your Search and Task Bar Have Disappeared 

Your computer screen has a standard layout. The address bar is at the very top and the taskbar is at the very bottom of the screen.

So what happens when your laptop’s layout changes and there is just an enlarged screen with no taskbar or exit button in sight?

The reason why your screen appears this way is because you accidentally hit the F11 key. 

All you have to do is hit the F11 key again and your screen will return to its normal layout. 

What is the purpose? 

If you want a bigger screen for more workspace, then the F11 button will come in very handy. 

As a bonus, F11 has a symbol below it often related to the computer’s volume. To activate the key’s secondary function, just hold down Fn and press F11 at the same time. 

Your Screen Flipped 90°

Can you imagine working on your computer while tilting your head to the left or the right the entire time just to see the screen properly? 

Well if you hit Ctrl + Alt + Arrow Keys that is exactly what will happen as you will see your screen go from landscape to portrait mode. 

To reverse this shortcut and align your screen you just have to hit the Ctrl + Alt + Upward Key to bring the screen back to its original position. 

What is the purpose? 

Depending on the tasks you perform, working on a vertical screen is very beneficial.

A vertical monitor allows for more space and improves productivity. For example, developers who use coding can see almost double the number of lines on a vertical screen than on a horizontal screen. 

Your Screen Keeps Zooming In and Out

When you are browsing the web, it becomes very inconvenient when your screen begins to zoom in and out uncontrollably. 

In reality, you do have control of this situation and it is quite simple to resolve. If your screen refuses to stay put, it is because you are either pressing Ctrl +  or unknowingly pinching your laptop’s touchpad. 

To get your screen back to its normal size, just press Ctrl – or pinch the touch bar using two fingers. 

What is the Purpose? 

The purpose of the zoom in/out features is to get a better look at your screen when needed. If a website uses a font that is way too small for you to read, or there is a large image that takes up the entire screen, these features are handy. 

What is so great about these four unusual keyboard shortcuts you didn’t mean to hit is that they are all easily reversible. 

If you notice that you have a hard time using your keyboard, not because of a shortcut but because it does not work well, restart your computer then try using it again. If a restart does not work, you may have a broken keyboard.  

The shortcut to get your keyboard repaired is to send it to an expert tech repair company like iFixYouri

Four Unusual Keyboard Shortcuts You Didn’t Mean to Hit By iFixYouri.

iPad Mini 1st Gen Glass Removal

iPad Mini 1st Gen Glass Removal can be completed yourself if you have the right tools and know-how. It just takes a little care and following the steps detailed in this guide. If you have trouble, you can visit iFixYouri for professional iPad Repair services.

Before we begin, there are some tips to keep in mind to keep the repair going smoothly. The heat pad is required to loosen the adhesive. Take your time getting the spudger in and you can complete the removal pretty easily. Keep your screws organized.

The real challenge is removing the digitizer clip and flex. You have to angle your spudger in, along with the lines of the edge of the iPad, so you don’t damage the connector. Use the spudger, not your fingernails.


Tools Required

iPad Mini 1st Gen Glass Removal Instructions
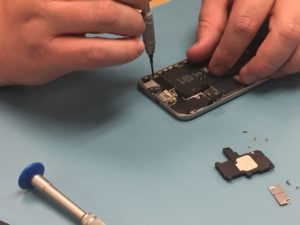
  1. Loosen adhesive with the heating pad (10min @ 75°C)
  2. Pry with metal spudger slowly and gently.
  3. Lift glass from bottom to avoid damage to the flex cable.
  4. Unscrew screen from the body with a Phillips head screwdriver. Keep your screws organized.
  5. Be extremely careful while removing the screen. Go gently around all the edges to loosen the LCD.
  6. Unscrew metal shield with your Phillips head screwdriver. Keep your screws organized.
  7. IMPORTANT: Disconnect the battery.
  8. Disconnect the LCD Flex.
  9. BE EXTREMELY CAREFUL. Separate the backside of the digitizer flex from the housing.
  10. Then, USING A PLASTIC SPUDGER, remove the digitizer clip evenly from the logic board.
  11. If the end of the flex cable is still attached, align your spudger with the side of the iPad and disconnect it.

Conclusion

Did you make it? Congratulations. If pulling off this repair was troublesome for you, please contact a professional iPad repair shop for help.

iPad Mini 1st Gen Glass Removal video screen shot

S6 Edge Rear Glass Removal – Samsung Galaxy Repair

S6 Edge rear glass removal can be completed without damage. It just takes a little care and following the steps detailed in this guide. If you have trouble, you can visit iFixYouri for professional Galaxy S6 Edge Repair services.

Before we begin, there are some tips to keep in mind to keep the repair going smoothly. The heat pad is required to loosen the adhesive. Take your time getting the spudger and guitar picks in and you can complete the removal pretty easily.

Tools Required

  • Heat Pad – soft mat with a variable temp electrical heating element
  • iSesamo, or metal spudger – used for prying device exteriors, never internal electronics
  • Guitar Picks – used as wedges for prying, playing cards can be used as well

S6 Edge Rear Glass Removal Instructions
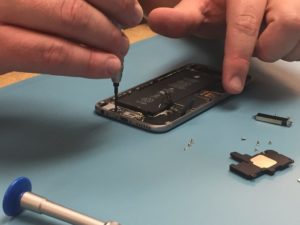
  1. Turn heat pad on, set to 80°C and place device backside down for 5-10 minutes.
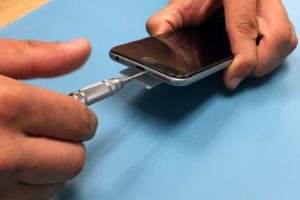
  2. Insert a metal spudger into the bottom between the back glass and the body to begin separation.

    S6 Edge Rear Glass Removal Step 2: Begin separating the glass with a metal spudger.
    Fig 1. Using the metal spudger
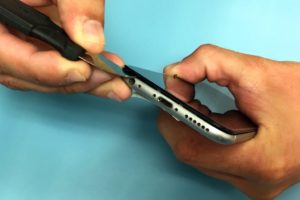
  3. Insert a guitar pick in place of the metal spudger.

    S6 Edge Rear Glass Removal Step 3: wedge a guitar pick between the glass and body.
    Fig 2. Use guitar pick as a wedge.
  4. Slowly keep adding guitar picks around the edge of the glass.

    S6 Edge Rear Glass Removal Step 4: wedge guitar picks around the glass.
    Fig 3. Continue wedging guitar picks.
     
    S6 Edge Rear Glass Removal Step 4: picks wedged around entire phone.
    Fig 4. Picks wedged around entire phone.

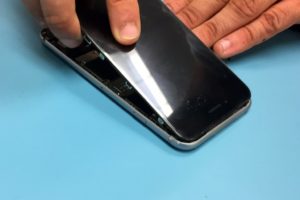
  5. Once you have added enough guitar picks around all the edges, remove the rear glass with care and ease.

    S6 Edge Rear Glass Removal Step 5: remove the rear glass from the phone body.
    Fig 5. Remove the rear glass from the body.

S6 Edge Rear Glass Removal FAQ

Is the heat pad required?

The back glass is held on by a strong adhesive. If you don’t use a heating pad before attempting to remove the glass, you will just shatter the glass (even further) and have a big mess that can potentially cut you. Be patient, give it a good 5 to 10 minutes to heat up and work its magic.

Why do you use guitar picks?

Guitar picks are a pretty ideal thickness to act as a wedge. Without the picks, the glass will reseat itself down into the adhesive and you are back where you started. Also, rock stars use guitar picks. Some people like playing cards instead of picks; your mileage may vary.

What’s the difference between plastic and metal spudgers?

They’re made of two different materials. Duh. Actually, the main difference is that metal is a conductor. Therefore, metal spudgers should not be used for internal smartphone or tablet repairs, where they could cause a short. Use metal spudgers for the exterior glass, where you may need the extra strength. Use plastic spudgers for internal components.

What can I do if I can’t do it?

If you have trouble performing S6 Edge rear glass removal, just take a breath. It isn’t going to render your phone useless. Brush the excess bits of broken glass and shame off the device and contact a professional repair company who performs smartphone repair.

iPhone 6s Plus Home Button Repair: How To

Introduction

iPhone 6s Plus Home button replacement is moderately challenging. The screen must be removed and several components and cables must be disconnected. You will note be able to use Touch ID after this repair – a note worth repeating.

Keep in mind that a home button replacement will eliminate the ability to use Touch ID.

Tools Needed

Recommended: Magnetic mat, screw capsules

Parts Needed:

  • iPhone 6s Plus Plus Home Button Assembly [BUY NOW]

General Repair Guidelines:

  • To reduce losing and confusing things, keep your workplace clean and organized.
  • Most screws cannot be interchanged. Group or strategically place your screws (in screw capsules) so you can track them.
  • Work in a well-lit space – smart device components are tiny. You’ll thank yourself for good lighting.

iPhone 6s Plus Home Button Repair Steps

Remove the Screen

  1. Unscrew the pentalobe screws on both sides of the lightning port on the bottom of the iPhone.iPhone 6s Plus Home Button Repair Step 1 -
  2. Using the metal spudger, pry the screen away from the body, starting at the bottom edge of the phone.iPhone 6s Plus Home Button Repair Step 2 -
  3. A flex cable near the top of the phone connects the screen and body, so open it carefully like a notepad.iPhone 6s Plus Home Button Repair Step 3 -

Undo the Flex Cables

  1. Unscrew the silver rectangular shield near the bottom right of the battery. This shield covers the battery cable, which should be disconnected for practically every repair.iPhone 6s Plus Home Button Repair Step 4 -
  2. Disconnect the display flex cable using a plastic spudger. Plastic spudgers, rather than metal spudgers, should always be used for removing items on the inside of the phone.iPhone 6s Plus Home Button Repair Step 5 -

Remove the Home Button

  1. Unscrew the two screws which hold down the home button bracket.iPhone 6s Plus Home Button Repair Step 6 -
  2. Use a spudger to disconnect the home button connector.iPhone 6s Plus Home Button Repair Step 7 -
  3. Push up slowly on home button from the front. Use your spudger to assist in loosening the rubber gasket that holds the button on the screen.iPhone 6s Plus Home Button Repair Step 8 -
  4. Nice work! You have removed the home button on the iPhone 6s Plus.iPhone 6s Plus Home Button Repair Step 9 -

For further help visit the following links:

iPhone 6s Plus repair by iFixYouri Smart Device Repair

iPhone 6s Plus Parts for a DIY repair

iPhone 7 Home Button Repair – The Full Story

In this post, the iPhone 7 is mentioned, but the information applies to the iPhone 7 Plus as well.

In previous versions of the iPhone, home button replacement was a simpler repair. The screen gets removed, a flex cable is disconnected, depending on the model, a shield is removed, and then the home button can be unscrewed and popped out. A replacement home button can then be installed and your phone is back to work. There were some earlier versions of iOS that locked phones with home button repairs done by a third party repair companies, displaying Error 53, but backlash forced Apple to eliminate this behavior in later updates. So let’s learn more about the iPhone 7 home button.
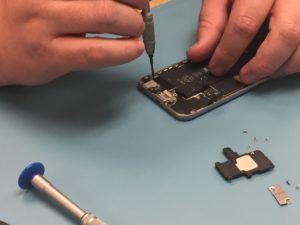
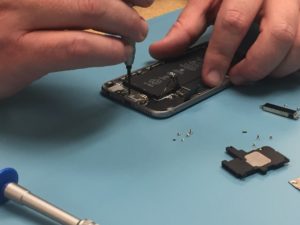
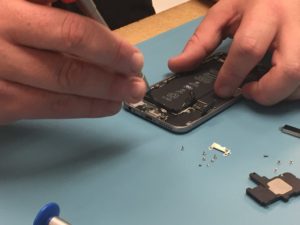
How is the iPhone 7 Home Button Different?

iPhone 7 Home Button Repair - the iPhone 3gs home button
iPhone 3gs Home Button

The home button has long been a part of the iPhone, since the first generation. It offered a quick escape option to get back to the home screen from wherever you may have navigated. Traditionally it was an actual physical button that had a click reaction when depressed. This physical motion was translated into an electronic signal which then traveled to the motherboard, letting it know it was time to leave the current app. In the hands of a professional, replacing these buttons was as simple as if they were buttons on your shirt. In the hands of a professional, replacing these buttons was as simple as sewing buttons on your shirt.

iPhone 7 Home Button Repair - the iPhone 7 home button
iPhone 7 Home Button

The iPhone 7 home button works in tandem with the logic board (Apple’s name for motherboards) and a software lock. So there’s not only hardware design involved with this component; it can be paired only with one specific logic board, as defined by unique coding. Additionally, the iPhone 7 home button is not truly a mechanical button at all. It is an indented fingerprint sensor which provides physical feedback via the Taptic Engine, Apple’s component for providing tactile sensations in the form of vibrations.

Starting with the Samsung Galaxy S8 and the LG G6, and now the iPhone X, phone manufacturers will most likely continue to omit a physical home button to fit more screen within the dimensions of the phone.

What Happens When You Replace an iPhone 7 Home Button?

If you replace the iPhone 7 home button with an after-market replacement part or even a different OEM replacement, you will see a message after booting up, “The home button may need service.” After displaying this message, a temporary fix on-screen home button appears.  You can navigate using this on-screen button, but after you’ve grown accustomed to using the actual button, it feels like a compromise. This Accessibility setting can be activated on any iPhone at any time by turning on AssistiveTouch.

iPhone 7 Home Button Repair - on-screen assistance

Why Does Apple Make Home Button Repair Difficult?

There are two possible schools of thought about why Apple would make the home button unique to each phone. Since the button is software controlled, the software lock closes a security hole. Think of the software lock as another unique physical passcode. If your phone is stolen or lost, nobody would be able to pop a new home button in and bypass your Touch ID.

The other possibility is that Apple is tightening the scope of its proprietary components and tools to grab a larger share of the repair market. Apple makes all the money on iPhone 7 home button repairs, at the expense of third-party repair companies.

What Are Other Options for iPhone 7 Home Button Replacement?

If your iPhone 7 home button no longer works, it must be taken to an official Apple store. The repair technicians at this store will use the Calibration Machine, which is shrouded in secrecy. Without AppleCare+ or a warranty, the repair will cost $319 for an iPhone 7 and $349 for an iPhone 7 Plus.


If you are in need of help with your iPhone 7 or iPhone 7 Plus, visit iFixYouri for an iphone repair. If you need iPhone 7 or iPhone 7 Plus Parts for DIY repair, click here.

iPhone 6 Lightning Port Replacement: How To

iPhone 6 lightning port repair is a moderately difficult DIY repair. In other words, some smartphone repair experience
helps. However, a patient hand can complete the repair successfully with these instructions. Above all, have fun. Let’s
get to it!

Tools Needed

Recommended: Magnetic mat [BUY NOW], screw capsules [BUY NOW]

Parts Needed:

General Repair Guidelines:

  • Always use good lighting – smart device components
    are small and you’ll need plenty of light to see what you are doing.
  • Maintain a clean, organized workspace so you don’t
    lose or confuse any components.

Introduction

Lightning port for the iPhone 6 is relatively easy, but it is buried under several components that must be removed in
sequence. This is an important repair because the lightning port component also holds the headphone jack and
microphone. The clasps holding the screen onto the body near the top are at an angle. The flex cable for the screen is
also towards the top. Keep track of your screws as there are quite a few different ones. Let’s do this.

iPhone 6 Lightning Port Removal Steps

Remove the Screen

  1. After that, unscrew the two pentalobe screws on either side of the lightning dock on the bottom edge of the iPhone 6.
  1. Use the metal spudger to slowly and carefully separate the glass screen of the iPhone from the body. Start on
    the bottom edge of the device and proceed slowly. The flex cable for the screen is at the top.
  2. Slowly pull the top of the screen away from the body and locate the EMI (electromagnetic interference) shield located by the bottom right of the battery.
  3. Unscrew the two screws securing the EMI shield to the logic board and remove it.
  4. Using a spudger, disconnect the battery cable from the logic board.

Remove Loudspeaker, Vibrator

  1. Right next to the lightning port connection there is a small black circle connected by a gold contact to a
    black wire. This is the antenna and it should be disconnected using the spudger.
  2. In the bottom right of the iPhone 6, the loudspeaker sits. It is a larger black component held in place by Four
    Phillips head screws hold it in place. It should be removed next. Unscrew the four screws and gently pry it
    out, using caution to not catch the antenna while you are pulling it out.
  3. After that, we will remove the vibrator, a black rectangle. It runs horizontally under the battery, on the bottom left of the phone. Two Phillips head screws hold it in place.

Remove Microphone Brace, Unscrew Lightning Port

  1. Remove the small black plastic brace that holds the microphone in place between the lightning port and the
    headphone jack.
  2. After that, remove the two screws on the top edge of the headphone jack component, the light grey square in the
    bottom left of your iPhone (above the headphone jack hole).
  3. Next, unscrew the six screws on the sides of the lightning port. They sit symmetrically, three on each side.
  4. You have now completed detaching the lightning port assembly. After that, it can be removed from the housing.
    However, if the microphone sticks, gently pry it with your spudger.
  5. Voila! You completed the mission. Work through
    the steps in reverse to install a new lightning port.

For Help, Repairs, or Parts

In conclusion, if you need parts or tools for this repair, or if this repair is too much to attempt on your own and you
need professional help with your iPhone 6 repair,
contact iFixYouri at 888-494-4349or www.ifixyouri.com.