Category Archives: Repair

Repair

How to Increase iPhone Processor Speed

Your smartphone has certain benchmarks for processing that can be overcome, increasing the processing power of your iPhone or Samsung Galaxy. By overclocking the internal processor, it is possible to boost the circuit boards and increase performance. This overclocking, however, greatly reduces the battery life of the iPhone and will rapidly drain it, even for programs that draw relatively little energy. The key to increasing iPhone processor speed lies in overclocking the processor through jailbreaking.

Benefits of Increasing iPhone Processor Speed

When you increase the processing speed of a phone, there are many benefits. Your apps take less time to power up and down, you can get better access to streaming internet content, and your wait times for pages to load is significantly reduced. One of the major criticisms of some iPhones is the amount of time they take to load content.

Secret to Increasing iPhone Processor Speed

Apple iPhones are “underclocked,” running at about half the capacity of their processor power. An iPhone 6S, for instance, can run at 1.4 megahertz but is set to run at only half that. Thus, overclocking the phone will boost processing speed by 50%, but will also drain the battery 50% faster. These safeguards put on the phone also prevent it from overheating. When you overclock an iPhone, it may heat up past the point of damage to the circuitry.

Jailbroken Phone Necessary for Increasing Processor Speed

An overclocked iPhone needs to be jailbroken, removing the limitations that Apple puts on their products. A jailbroken phone automatically violates Apple’s warranty process, meaning that overclocking your phone will make it impossible to get it fixed by Apple’s product services. It is best to jailbreak an iPhone once the warranty has expired or else you risk losing the phone in the event of damage. Using a cooling pad minimizes the damage that overclocking could present.

Overclocking 101

There are a number of protocols that you can download from the internet to overclock your phone. File-sharing sites and torrent distributors have the files needed to install overclocking software on your processor. It will be necessary to download and rename the file, however, since the device will automatically block any files do not have Apple configurations. Install it on your phone and reboot the processor. Your iPhone will utilize the program to run on a new processor configuration.

Overclocking Can Damage iPhone

In addition to boosting processor speed and heating up the phone, overclocking will reduce the lifespan of your phone’s computer processing unit. The best way to maximize CPU life and minimize heat is to close the apps you are not currently using and to check the temperature often. Anytime you jailbreak or overclock a phone, you do so at your own risk. Increasing the processor speed on a brand-new smartphone is not recommended, especially since some new devices (like the Galaxy Note 7) are subject to recalls and jailbroken iPhones cannot be recalled or replaced.

While it is possible to increase iPhone processor speed, it can end up causing you more issues with your phone.  Since you’ve voided the warranty by jailbreaking your iPhone, you’ll need to get it repaired by a third-party professional company, like iFixYouri.
 

How to Replace iPhone 4 Headphone Jack

After spending several hundred dollars on a brand new Apple iPhone, the last thing you want to do is replace the iPhone 4 headphone jack due to an internal or external problem. The iPhone 4 headphone jack is prone to damage if mishandled or if you accidentally drop your phone. Luckily, you can easily replace it with a new one.

Replacing iPhone 4 Headphone Jack

In order to repair a headphone jack on an Apple iPhone, you will need several tools, including:

  • Paperclip
  • Phillips number 00 screwdriver – Buy
  • Small Flathead screwdriver
  • Spudger – Buy

Cost of Replacing iPhone 4 Headphone Jack

In order to change the headphone, you will have to buy the required tools. The tools will include opening tools that will allow you to get into the shell of the iPhone without damaging the circuitry underneath. While this sounds like a daunting task (especially since it can void the Apple warranty), it is possible to achieve with careful dexterity.

Preparations

Once you have all the tools and parts, including the replacement part and the opening tools, you have to clean your iPhone and work station carefully in order to avoid getting dust within the interior of the opened phone. Degrease all metal parts and contact points so that the oil on your fingertips does not interfere with the circuitry. If you wear gloves, clean the tips of the gloves carefully and ensure they are not damp.

Disconnecting the Headphone From The Motherboard

Once you have opened up the iPhone, you need to disconnect the headphone jack from the motherboard’s sockets. The two small screws on the edge of the headphone jack need to be removed with the Phillips’ head screwdriver. Once they are removed, the entirety of the headphone jack can be taken out with the spudger.

The connecting wire of the headphone jack is only held loosely in place, so that it may be taken out easily. The next step, however, is replacing the part and keeping the connecting wires from flapping around. Using a hot glue gun can keep them down. Once it is firmly in place, screw the new headphone jack in with the flathead screwdriver. Clean the area again and then plug in your headphones to see if they now work and project sound.

Easy Enough? Or Let the Experts Handle it?

Although you can personally replace the iPhone 4 headphone jack, the risk of messing up and damaging the entire phone is quite high. Plus, the cost of buying tools and the new part might seem like more of a hassle than getting a professional repair company to do the job, like iFixYouri.  You simply ship the phone to us, and we’ll get it back to you fixed – it’s that simple.


How to Change a Cracked iPhone Screen

How to Recover Data From a Damaged iPhone

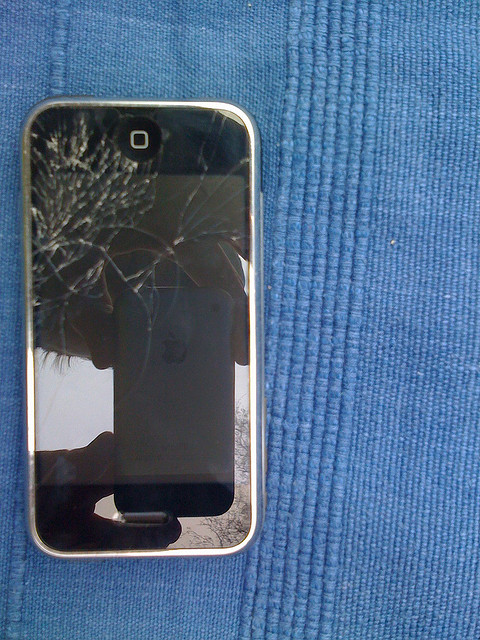
You have finally bought an iPhone and you are enjoying every moment of it but unfortunately, the screen gets cracked or broken and you are confused because you do not know how to change a cracked iPhone screen. Some people might even decide to shop for a new iPhone since the broken one no longer seems attractive as it was before. When you find yourself in such a situation, you need the right tips and ideas of how to change an iPhone screen to save the hassle and expense of a new phone.

Tools Required – How to Change a Cracked iPhone Screen

Before you even start the process of changing the iPhone screen, ensure that you have the right tools, most of which can be found online. This helps you get the exact size that you need instead of shopping online where you are not very sure about the dimensions. If you prefer shopping online, ensure that you have the right dimensions that will be compatible with your device. Here is a list of the basic tools that you should have:

  • Replacement glass
  • Philips screwdriver
  • A wedging and scraping device or a razor blade
  • Superglue or double-sized tape
  • A pair of scissors
  • Q-tips and Rubbing alcohol
  • Heat gun or hair dryer

Step 1: Unscrewing The iPhone With a Cracked Screen

Cracked iPhone Screen

Check the bottom part of your iPhone and take keen interest on the side that has the Home button. You will notice two screws fitted on both sides of the USB port. Unscrew them using the Philips screwdriver. Also remember that it will not be necessary to remove the SIM card for you to open the device.


Step 2: Removing The Cracked iPhone Screen

The screen can be removed using two major methods. You can either use a scraping or wedging tool. A razor blade is mostly preferred because it can be fitted between the metal and the rubber to lift the screen. Alternatively, you can use a suction cup by placing it above the Home button then pulling it up gently. You will notice that the glass has been removed without damaging the rubber gasket that surrounds it.

Step 3: Separating The Screen From The iPhone

Cracked iPhone Screen

Check for the flaps that hold the phone and the screen together at the top right corner. They are normally labeled 1 and 2 attached to orange stickers. You will also notice the 3rd sticker placed under the 2nd flap. It should be released by lifting the black clamp.  At this point, you will notice that the screen has been completely separated from the iPhone.

Step 4: Detaching The Screws

The interior of the device has 5 screws along the side rails, 3 along the flaps and 2 on the opposite sides. These screws are of the same size and that means you should not worry about where to place them after completing the installation process. You will also notice a black tape over each screw and you can cut it off using a razor blade. The black tape is less important in this case.

Step 5: Separating The LCD From The Glass

Detach the LCD screen from the glass by putting the wedge between the rails then wedge the inner section out. For you to clear the top flanges, make sure the LCD drops down near the Home button. Use some little force if possible because the metal cannot get distorted that easily.

Step 6: Scrubbing The Adhesive

Use a wedging device or razor blade to scrape the glass leftovers or any other pieces along the metal frame. It is also possible to use a hair dryer or heat gun but this should be done carefully to avoid distorting the frame. The bonding agent may not dissolve by rubbing alcohol so you can try scrubbing using a Q-tip then removing it with a razor blade.

Step 7: Installing The New Screen

Cracked iPhone Screen

When installing the new screen, make sure the super glue does not cross to the Home button. You may also decide to use a double-sided tape but ensure it is trimmed properly. Adhesive should be applied along the black plastic at the top or bottom sides while excluding the middle part. Use the tweezers to control the double-sided tape so that you do not let your fingers touch it thus weakening its ability to stick. Also ensure that you take away the protective plastic found on the new glass where it is expected to touch the tape.

Step 8: Installing The LCD

Install the LCD glass and make sure it fits properly by sliding it from the bottom part of the device. Fix the screws back where they belong and also restore the 3rd cable into the clamp. Press the 1st and 2nd cable onto the connector by using a little pressure. Do not worry if you miss the connector several times because this is quite common.

Step 9: Assembling The iPhone

Restore the screen back to the iPhone by inserting the top part first. The sides should be attached to the connectors and also make sure the bottom fits in properly. When the LCD and screen are well-fitted, fix the remaining 2 screws back into their places found on both sides of the USB port.

DIY vs. Professional Repair

These are the most crucial tips on how to change an iPhone screen; however, as you can see, it is a long and rather confusing process. That is where we at iFixYouri come in handy. We can replace your cracked iPhone screen properly and inexpensively.


DIY Fix: The iPhone Repair Kit

iphone-repair-kit-ifixyouriThe iPhone has a carefully engineered design that it appears so sleek and compact while packing the best features a smartphone can have beyond the mainstream standards. Unlike other electronic devices with screws and cracks, which can be used to access the internal components, the iPhone appears seamless, brought about by its unified design concept. Thus, the internal components of the Apple smartphone cannot be accessed easily without the use of an iPhone repair kit.

Why Get An iPhone Repair Kit?

The issues one may experience with an iPhone is indicative of the problems one may experience with any sophisticated electronic device. However, the added element of  this particular device being so closely streamlined to our own individual lives make it that much more sensitive. Here are the reoccuring problems that may warrant an iPhone repair kit:

Issues with the iPhone

Apple has always emphasized integrity when it comes to the design of their products. The iPhone, in particular, was designed in such a way that end-users would just have to enjoy the features of the product without having to deal with common issues that other smartphones possess. In certain instances, however, the iPhone can still be prone to some unlikely issues such as screen damage and battery replacement.

Damage of the LCD Screen

Screen damage of the Apple smartphone is highly unlikely because of the tough Gorilla glass protecting the liquid crystal display (LCD) screen. Nonetheless, impacts strong enough to push beyond the threshold of the Gorilla glass can still occur. When the glass is cracked, the phone may still function but the display can be difficult to read due to the crack lines along the damaged portion of the screen.

Shorter Battery Life

Another issue with the iPhone is battery replacement. No matter how strict quality control is in the manufacturing unit of Apple, product deviations from the norm are unavoidable. Among these deviations, battery life seems to be the most relevant. Not all batteries are created equal although strict manufacturing conditions intend to create these power packs identical. Hence, some iPhone units have longer lasting batteries while some others have less. For this kind of issue, battery replacement is ultimately the most obvious solution if not to buy another smartphone.

The iPhone Repair Kit

Note: It should be emphasized that due to the complicated nature of this device, the best measure for having an iPhone repaired that has experienced significant damage would be to take it an expert such as iFixYouri.

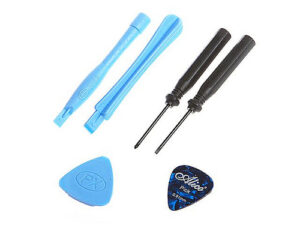
A set of screwdrivers is not enough to pry open the iPhone for repair; that is why third-party manufacturers came up with a repair kit especially put together for repairing the Apple smartphone. A kit designed for this purpose usually comprises opening levers, guitar opening tools, and pentalobe screwdrivers among others.

Opening levers are ideally made of strong plastic so as to avoid scratching the metallic components of the unit while still being able to apply enough force. The pentalobe screws designed for resistance from tampering can be unscrewed with specially designed pentalobe screwdrivers. Other accessories may include suction caps and phone mounting brackets for organized DIY repairs of the smartphone.

The Simple Truth

Not all issues, however, can be repaired with a DIY iPhone repair kit. For advanced technical issues beyond DIY repair, iPhone owners should bring their units to repair centers where skilled technicians with advanced tools can certainly solve most, if not all, issues.

The Most Dangerous States in America For iPhones

Mishandling of electronic devices is a real issue. Thanks to SquareTrade, a company that deals in warranties, you can know which states are the likeliest to have broken iPads and iPhones. The South is apparently a real graveyard for some products, but the North is not far behind.

Examining both damage and complete breakage, SquareTrade found Mississippi and South Carolina to both be particular dangerous. Mississippi totals the most damage done to iPhones, but South Carolina holds the record for broken iPads.

Dangerous States for iPads

Are people dropping their phones in the Mississippi River?

New Mexico is not far behind Mississippi, and ranks number 2 for a dangerous place for iPhones to be. Maybe it’s called “New” Mexico cause everybody has to frequently replace their devices.

SquareTrade informs us that drops and beverage accidents are the most likely causes for damage. Some of the southern states have a reputation for being boisterous, and perhaps a little reckless. Maybe this contributes to the problem?

Other Dangerous States for iPhones

Other dangerous US states for iPhones are Rhode Island and North Dakota. For iPads, Nebraska, Washington D.C. and Alaska are not good places to be. Perhaps the devices are succumbing to the cold while people use them for navigation.

SquareTrade routinely puts electronic devices through rigorous testing to see how much abuse they can take. Ironically, it means being in the hands of an employee of the company might end be being one of the worst places to be for one of these great products.

Remember, if you don’t have a warranty, the alternative to buying a whole new iPhone is to just get your iPhone fixed by professionals like iFixYouri — in some cases, it’s cheaper than a warranty in the first place!

Do it Yourself Repairs – Are They Really Cheaper?

Is it worth it to do a Do It Yourself iPhone repair instead of having it professionally done?  This article will examine the costs and the benefits of the two.  Hopefully, this will make it easier to decide between doing a repair yourself and having it done professionally by the cast at iFixYouri.

We all know that going with the Do It Yourself (which will now be shortened to “DIY”) route is seemingly cheaper.  At least, it appears that way in theory.  Of course, once everything is said and done, one might find that the DIY repair costs more money, time, and effort than it would have cost by using a  professional.  Moreover, it’s possible to permanently damage the device, rendering it unfixable.

What are the reasons? First, time alone is a major issue.  Most people obviously have little to no experience repairing iPhones or iPods and DIY repairs can be timely without the practice.  An average iPhone glass repair can easily take one to two hours.  Now, the more a person does something, the more familiar he or she gets with the process and the quicker they get at doing it.  Yet, the first time someone attempts to repair a broken screen (for example) they should be ready to spend well over an hour.  Other repairs, such as replacing a back cover, can take four or more hours.

Next, effort is going to play a major role.  It’s true that the effort put into learning how to repair an iPhone is wonderful.  A person can learn a lot while dissecting their very own device.  That person should keep in mind that he is the owner of that device and therefore, has to deal with whatever the outcome.  None of these repairs are easy by any means.  When the phone is laying there in pieces, screws scattered about, parts spread out, it will be hard to put it back together correctly.  So, a DIY person must take his or her time and pay close attention to every little detail.

The last thing to consider is money.  Money is the most important factor in our decision of choosing a DIY repair over a professional repair.  The initial cost of the DIY kit/part will be cheaper than having it repaired by an business.  This is simply because the labor and service costs are no longer present.  Again, it is wise to keep in mind that these repairs are difficult and there are many parts that can be broken or damaged while performing a DIY repair.  This leads to a new problem, whereas the original problem with the device may have been a quick repair.  When a part gets damaged or broken, it will inevitably lead to more time and effort, which means more money spent on the new problem.  Anyone who has broken an iPhone knows how fragile they are.  They are just as fragile once disassembled.

In conclusion, DIY repairs are perfectly fine for a person who has experience repairing iPhones and can confidently fix them.  If the person who chooses to do a DIY repair is fortunate enough to have a few broken iPhones laying around, he can experiment with those and then try tackling his primary phone.  However, for the majority of people who are inexperienced yet want confidence that the broken device will work like new with the least amount of hassle, please get it professionally done.  It will save your time, effort and money.

Insurance for Your iPhone…Not Great for Everyone

iPhone Insurance

Early in 2010, AT&T announced that they would offer an insurance plan to cover all new iPhones.  The plan would cost you $11.99 per month, and must be signed within 30 days of purchasing a new iPhone.  The announcement was great news to iPhone owners who have been dismayed by the lack of an insurance option for their devices.  To me, this proclamation lost its shimmer once I thought about what a bad deal this is.

First, let’s talk about what insurance really is.  It is peace of mind, simply put.  You agree to pay money to a company and receive no product or service in return.  All you receive is a promise that the insurer will pay in the event of a loss.  Often times, the losses can be enormous (e.g., a flood, sudden death or home fire).  Yet, because these events are statistically unlikely to happen and the insurance companies know it, the cost of such peace of mind comes at a low enough cost to be a good value.

What if some sort of loss occurs more frequently (a cracked iPhone screen or an auto accident by a teenager, for instance)?  What does an insurance company do to account for that?  Well, they price the premiums higher because there is a higher likelihood that a loss will occur.  If the insurance company does not price the premiums high enough, the insurance company will go out of business.

So, how much does peace of mind cost for a $600 or $700 iPhone that break more often and cost more than many other smart-phones?  Well, it’s a price that I don’t believe is a good bargain.  First of all, at $11.99, the premiums alone are $287.76 for the duration of a two-year contract.  In addition, if you have a iPhone 4 with any size memory or an iPhone 3Gs with memory over 16GB, you must pay a deductible of $199 to replace your damaged device before you can get a replacement.  That added together is $486.76.  That’s a huge amount of money to insure a phone that costs $700 for the most expensive 4th Generation iPhone on the market and $600 for the next model down.  3Gs iPhones cost even less to replace.

Why not, instead of paying such a high premium for insurance, take advantage of iFixYouri?  You can fix a cracked 4th Generation iPhone screen for $109.  We even sell fully refurbished iPhone 3G’s for $149.  And you saved $11.99 a month.

The bottom line is that before you let yourself get talked into insurance by a sales representative, make sure this peace of mind is worth the cost according to your own lifestyle.  Measure the cost against the risk.  The sales rep gets commissions for selling insurance and will always recommend it.  They do not repair the devices and therefore does not make any money if customers know they can get their phone repaired elsewhere.  The price of the monthly premium adds up and if you are a person who typically doesn’t break electronics or lose things, then your money is wasted.

A creative way of shipping in your device

During our daily shipment today we received a package that was shipped in. From the outside it looked normal, sturdy box. When we opened it, well, it was creative. A new twist on air-packing. This customer partially inflated 20 or so balloons, and stuck the phone in bubble wrap in the middle of them. A+ for creativity and your phone making it to us safely! Packing peanuts…naaaaa….void filler paper….naaaa….more bubble wrap…no chance! How about 20 some odd partially inflated balloons! Perfect! If this customer reads this post….we’re not judging…just sharing the creativity that you brought to the table when shipping in your phone. For that we say thanks from the iFixYouri Team!