Category Archives: Repair

Repair

iPhone 7 Screen Repair: How To Do It Yourself

iPhone 7 screen repair can be accomplished smoothly if you take your time and have the correct tools and equipment.

Tools Needed:

Recommended: Magnetic Mat [BUY NOW],
Screw Capsules [BUY NOW]

Parts Needed:

General Repair Guidelines:

  • Always use good lighting. Smart device components, for instance, are small. You’ll need plenty of light to see
    what you are doing.
  • Maintain a clean,
    organized workspace
    . This prevents losing or confusing any components.
  • Group your screws so you can keep track of where they came from. Most screws cannot be interchanged.
  • Apply enough heat to loosen adhesive. However, take care not to overdo it and damage the device.
  • At any point, if the adhesive becomes hard to separate, apply more heat.
  • After separating adhesive, keep the housing and screen in close proximity until flex cable is disconnected.

Introduction

iPhone 7 screen repair is moderate in difficulty. Several flex cables can be torn easily. Above all, use caution. For
instance, loosening the adhesive that keeps the screen sealed to the body requires properly heating them with a
dehydrator or heat gun. Let’s get to it!

iPhone 7 Screen Repair Step by Step

Before beginning, heat up the device’s interior adhesive strips with a dehydrator, heat gun, or heat mat. Heat guns are
the quickest. However, use caution. It can be easy to overdo it and damage the device.

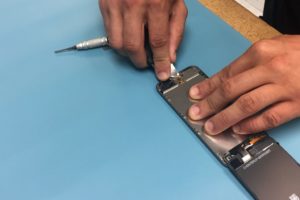
Open the iPhone 7

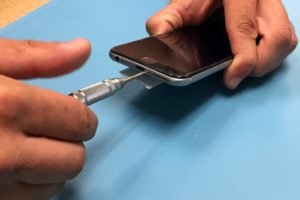
  1. Unscrew the two pentalobe screws on the bottom edge of the phone on either side of the lightning port.
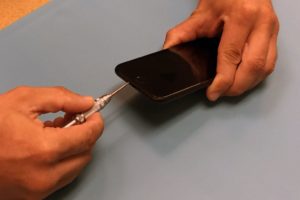
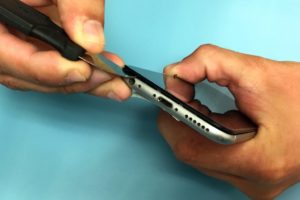
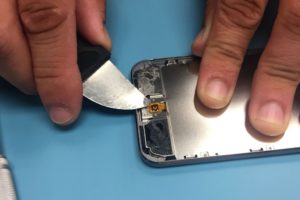
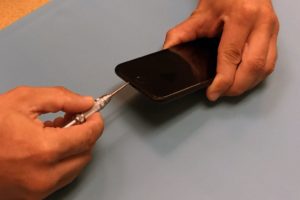
  2. Use the metal spudger to slowly and carefully separate the screen of the iPhone from the body. Start on the bottom
    edge of the device and proceed slowly.
  3. Continue using the metal spudger or use playing cards or guitar picks to gently separate the adhesive up the sides
    and top. Don’t push too deeply towards the center of the device.
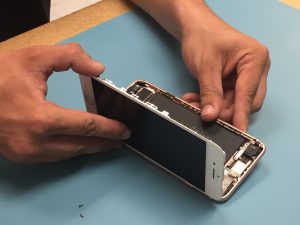
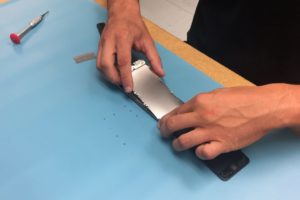
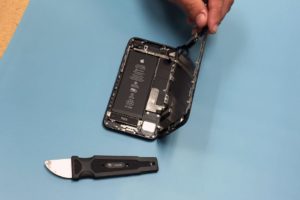
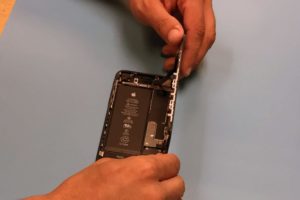
  4. The left side of the screen will open off the body; like a book opened from the back cover. The flex cable
    connecting the screen to the battery will still be attached so open it carefully.
Disconnect the Cables

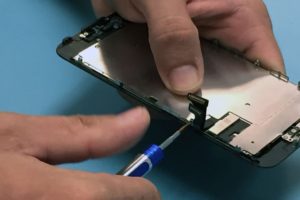
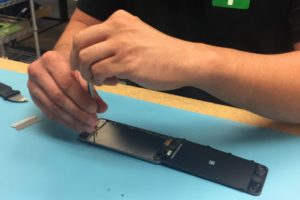
  1. A silver EMI shield on the mid-right side of the phone needs to be removed. It is held in place by four tri-point
    screws.
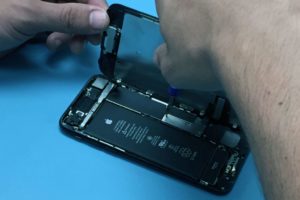
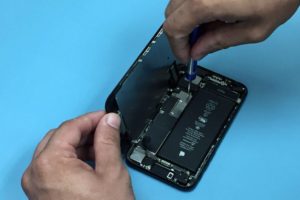
  2. After removing the shield, use a spudger to disconnect the battery from the logic board.
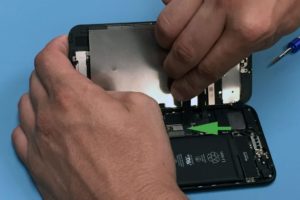
  3. Use the spudger to disconnect the display connector flex cable.
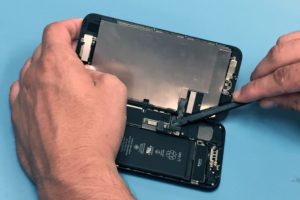
  4. Remove the two Philips head screws on the shield over the front panel sensor assembly connector. It is the silver
    shield near the top of the phone with the flex cable coming out of the bottom.
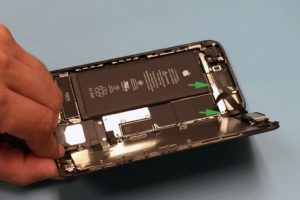
  5. With your spudger, disconnect the black front panel sensor assembly connector cable from the logic board. It is
    the one that connects the screen to the body.
  6. You can now remove the LCD assembly of the iPhone 7 from the body.
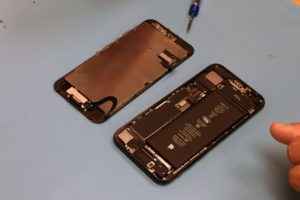
Remove the Front Camera and Earpiece

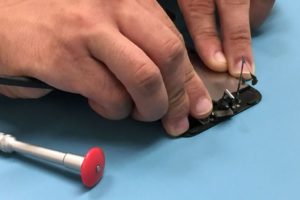
  1. Next, we will remove the three Phillips head screws that hold the silver earpiece bracket on the top of the LCD
    assembly.
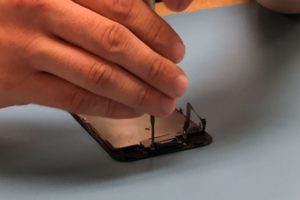
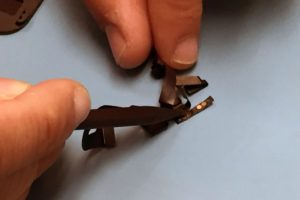
  2. Pull the front camera up and out of the way with your spudger or tweezers. Remove the two Phillips head screws
    attached to the earpiece speaker. You can now also remove the earpiece speaker.
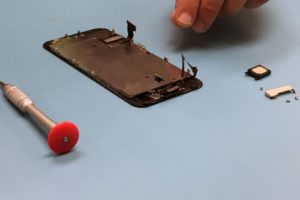
  3. Use your spudger to remove the ambient light sensor and proximity sensor. This is a thin cable that is easy to
    tear so use caution.
Remove the Touch ID/Home Button

NOTE: The touch ID must be removed carefully. Failing to remove it safely or breaking it will require visiting
an Apple store.
The touch ID must be removed carefully. Failing to remove it safely or breaking it will
require visiting an
Apple store.

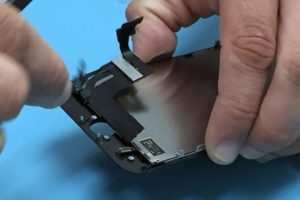
  1. Remove the four pentalobe screws holding the touch ID/home button bracket.
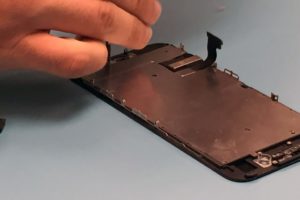
  2. Work your way around the side brackets on the both sides of the assembly, unscrewing all 6 tri-point screws.
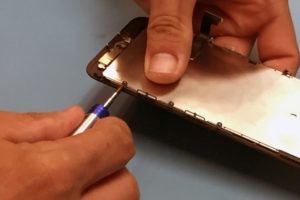
  3. Peel the large LCD shield away, starting from the top.
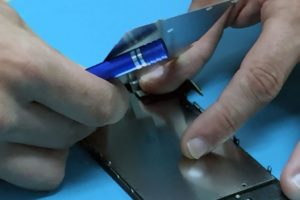
  4. Use your spudger to disconnect the home button cable connector.
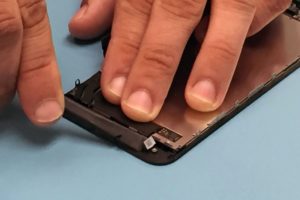
  5. Disconnect the underlying connection with caution.
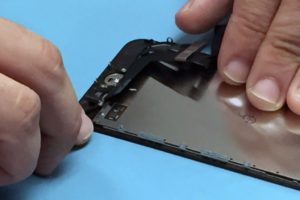
  6. Pry the adhesive holding the touch ID/home button to the back of the digitizer.
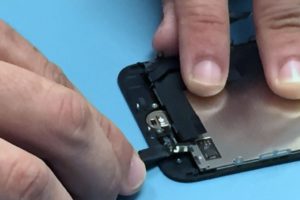
  7. The home button is now unattached and can be removed but pushing it forward through the front of the screen.
For Help, Repairs, or Parts

For iPhone 7 Replacement Parts, or if iPhone 7 screen repair
is too much to attempt on your own and you need a repair professional skilled at iPhone
7 Repair
,
contact iFixYouri at 888-494-4349 or www.ifixyouri.com.

How To: iPad Air 2 LCD Removal

Introduction

iPad Air 2 LCD removal is relatively easy to perform if you have some repair experience. Replacing requires transferring the home button, which is moderately difficult. The iPad Air 2 was a solid performer in its hey-day and still holds good value.

Proper attention should be given to safely loosening the adhesive strips with heat. Keep an eye out for the flex cable. So let’s get to it! Text directions are located below the video.

Tools Needed:

  • Metal Spudger [BUY]
  • Phillips Head Screwdriver #000 [BUY]
  • Spudger [BUY]
  • Guitar Pick
  • Dehydrator, Heat gun, or Heat mat

Recommended: Magnetic mat [BUY], screw capsules [BUY]

General Repair Guidelines:

  • Always use good lighting – smart device components are small and you’ll need plenty of light to see what you are doing.
  • Maintain a clean, organized workspace so you don’t lose or confuse any components.
  • Apply enough heat to loosen adhesive but not enough to damage the device.
  • At any point during a repair, if the adhesive becomes hard to separate, apply more heat.
  • After separating adhesive, keep the housing and screen in close proximity until flex cable is disconnected.

iPad Air 2 LCD Removal Steps

Click an image to enlarge

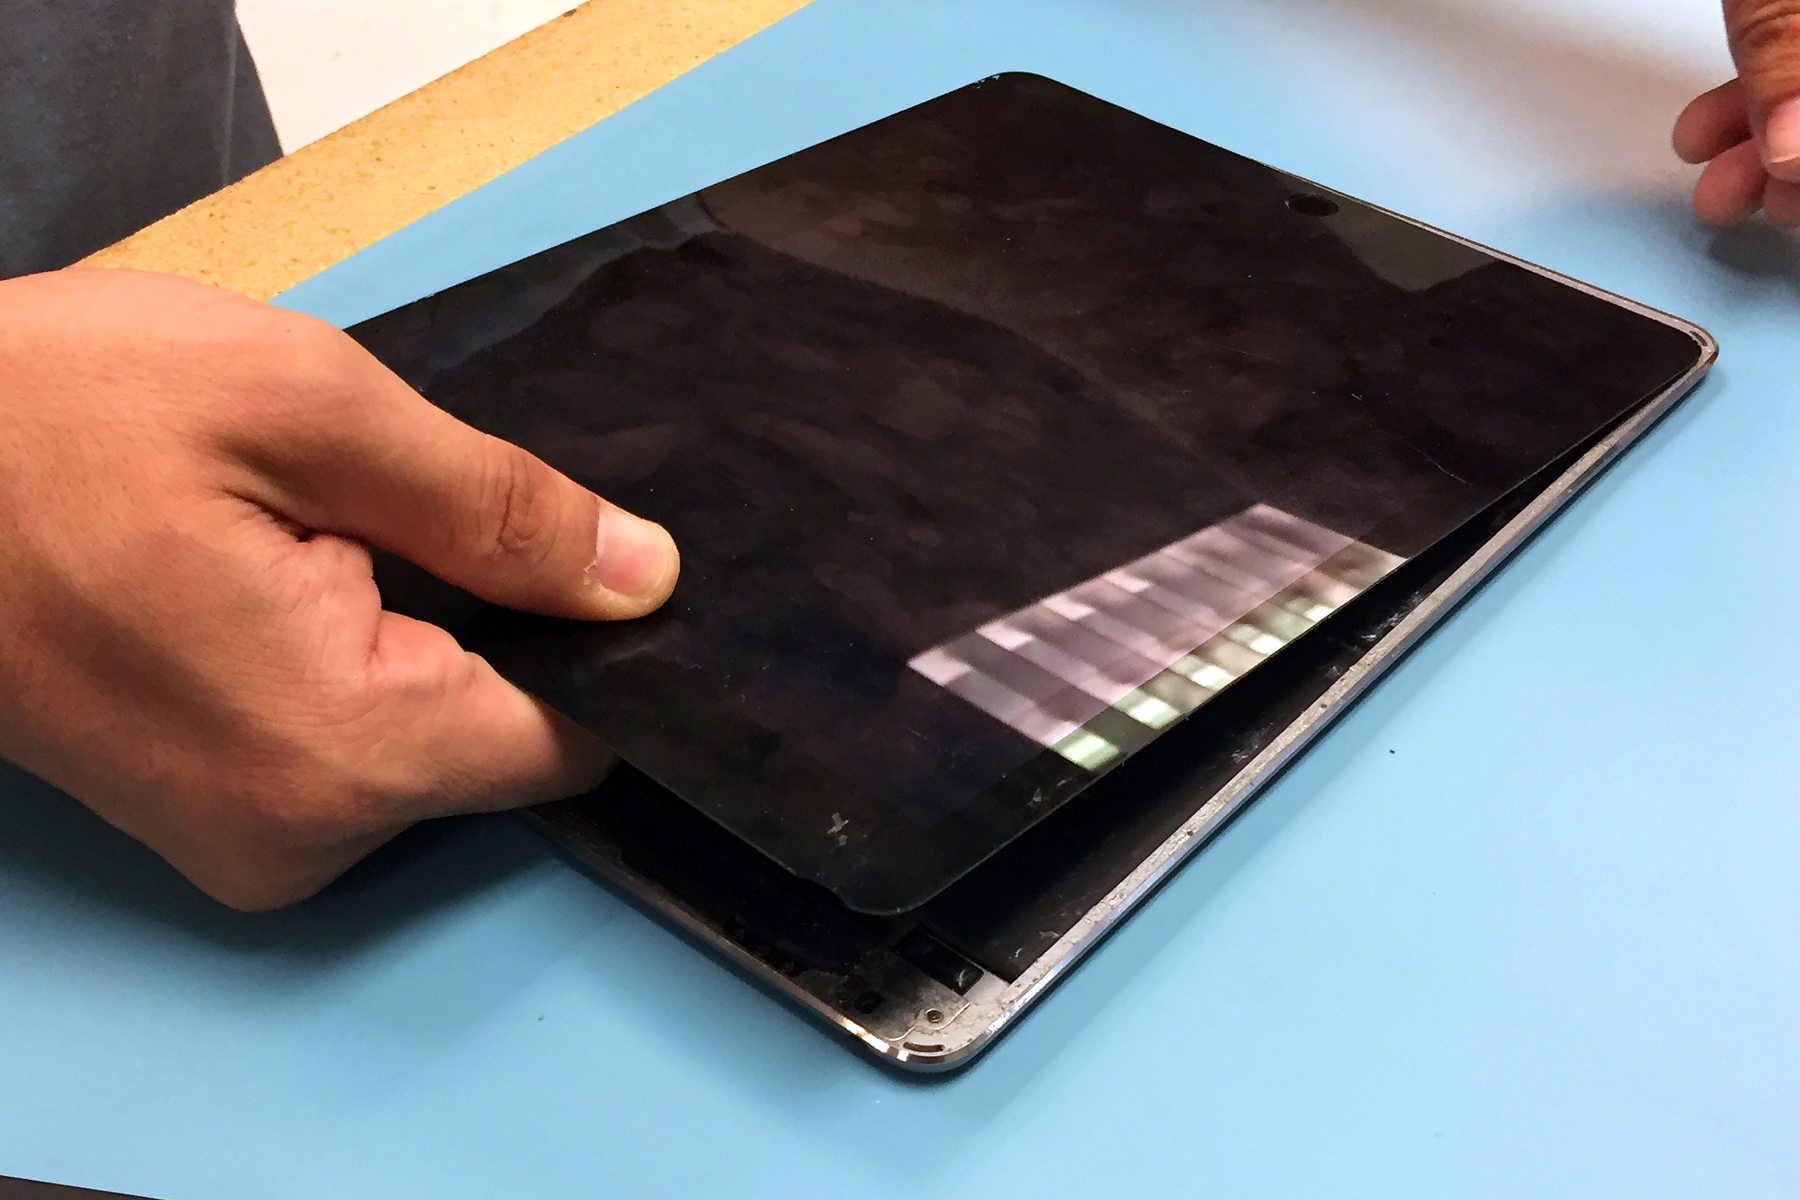
Heat up the device’s interior adhesive strips with a dehydrator, heat gun, or heat mat. Heat guns are the quickest, but use caution as it can be easy to overdo it and damage the device. Use the metal spudger to slowly and carefully separate the screen of the iPad from the body. Start on the bottom edge of the device and proceed slowly.

iPad Air 2 LCD Removal Step 1 iPad Air 2 LCD Removal Step 1b

Continue using the metal spudger or use playing cards or guitar picks to gently separate the adhesive up the sides and top. Don’t push too deeply towards the center of the device.

iPad Air 2 LCD Removal Step 2 iPad Air 2 LCD Removal Step 3

The screen is connected via flex cable, so do not pull the LCD far from the body. Unscrew the screw connecting the battery to the logic board.

iPad Air 2 LCD Removal Step 4 iPad Air 2 LCD Removal Step 5

Slide a guitar pick between the connection to ensure no power travels from battery to logic board during repair.iPad Air 2 LCD Removal Step 6

Unscrew the screws holding the shield over the flex cable connections.iPad Air 2 LCD Removal Step 7

Disconnect the two flex cables connecting the LCD panel and the logic board.

iPad Air 2 LCD Removal Step 8 iPad Air 2 LCD Removal Step 9

Voila! You have removed the LCD assembly of the iPad Air 2. If you have a replacement LCD, just work through the steps in reverse. You will need to switch over the home button for touch ID functionality, which is considerably more challenging.iPad Air 2 LCD Removal Step 10

For Help, Repairs, or Parts

If you need parts or tools for this repair, or if this repair is too much to attempt on your own and you need a repair professional skilled at iPad Air 2 repair, contact iFixYouri at 888-494-4349 or www.ifixyouri.com.
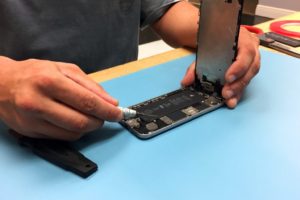
iPhone 6 Battery Replacement: How To Guide

Introduction

iPhone 6 Battery replacement is relatively easy. The clasps holding the screen onto the body near the top are at an
angle. The flex cable for the screen is also towards the top but you will not need to disconnect it to replace the
battery.

There are two strips of white adhesive under the battery that are a nuisance to remove but it is much harder to try to
pry the battery out without doing so. Let’s do this.

Exercise caution when working with batteries, especially swollen
ones
.

Tools Needed

  • Metal Spudger [BUY]
  • Pentalobe Screwdriver #000 [BUY]
  • Spudger [BUY]
  • Tweezers [BUY]
  • Tape [BUY]

Recommended: Magnetic mat [BUY],
screw capsules [BUY]

Parts Needed

iPhone 6 Replacement Battery [BUY]

General Repair Guidelines:

  • Always use good lighting – smart device components are small and you’ll need plenty of light to see what you
    are doing.
  • Maintain a clean, organized workspace so you don’t lose or confuse any components.
  • After separation, keep the back housing and screen in close proximity until all flex cables or other wire
    cables are disconnected.

iPhone 6 Battery Removal Steps

  1. Unscrew the two pentalobe screws on either side of the lightning dock on the bottom edge of the iPhone 6.

2. Use the metal spudger to slowly and carefully separate the glass screen of the iPhone from the body. Start on
the bottom edge of the device and proceed slowly. The flex cable for the screen is at the top.

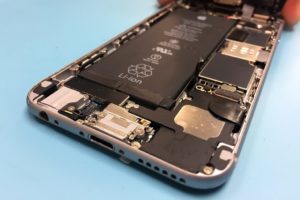
3. Slowly pull the top of the screen away from the body and locate the EMI (electro magnetic interference) shield
located by the bottom right of the battery.

  1. Unscrew the two screws securing the EMI shield to the logic board and remove it.

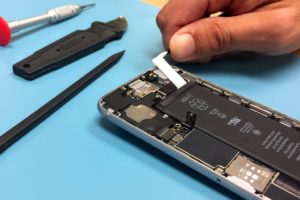
  1. Using a spudger, disconnect the battery cable from the logic board.

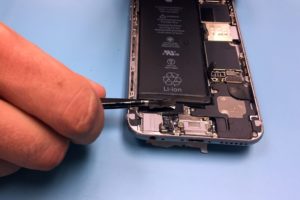
  1. The next steps involve removing the adhesive tape underneath the battery to make it easier to remove. Slide one
    tip of your tweezers under the black adhesive strip at the bottom of the battery. Each black strip runs halfway
    across the bottom of the battery.

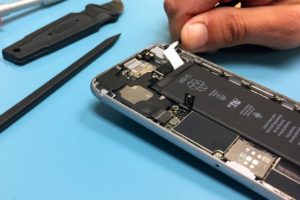
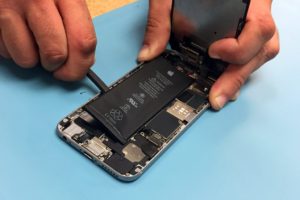
  2. Now roll your tweezers away from the battery while simultaneously pulling the tape out from underneath the
    battery.

  3. Continue to pull the tape out from underneath the battery and roll it around the tweezers. It may help to pull
    diagonally out from the corner as the tape runs up the full height of the battery.

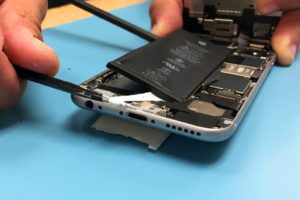
  4. If the white tape snaps apart you may need to use a spudger to carefully pry the battery up. Continue using a
    combination of tweezers and the spudger to separate the battery from the body of the iPhone. You will have to
    repeat the process to remove the second strip of tape.

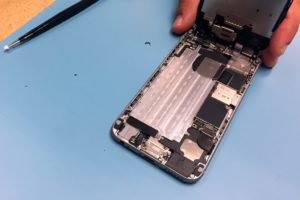
  5. Now you can remove the battery. Use a small length of some adhesive tape to secure the new battery in place.
    Reconnect the battery cable to the motherboard and screw the EMI shield back on.

  1. Reattach the screen by angling the top in first and then clicking the side clasps into place. Replace the two
    screws by the lightning dock. That’s it! You’re done.

For iPhone 6 Battery Help, Repairs, or Parts

If you need parts or tools for this repair, or if this repair is too much to attempt on your own and you need
professional help with your iPhone 6 repair,
contact iFixYouri at 888-494-4349or www.ifixyouri.com.

iPod Touch 5th Gen Battery Replacement: How To

Introduction

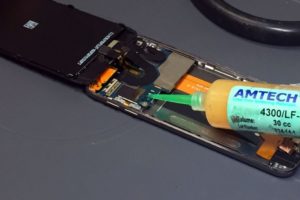
iPod Touch 5th gen battery replacement is moderately difficult. The eight clasps holding the screen onto the body will make snap noises when they are unclasped. Don’t immediately pull the screen from the body as you will probably tear the cable to the home button. Step by step instructions are below the video.

Tools Needed

  • Razor Blade
  • Metal Spudger [BUY]
  • Phillips Head Screwdriver #000 [BUY]
  • Hot Air Rework Station
  • Spudger [BUY]
  • Soldering Station
  • Flux

Recommended: Magnetic mat [BUY], screw capsules [BUY]

General Repair Guidelines:

  • Always use good lighting – smart device components are small and you’ll need plenty of light to see what you
    are doing.
  • Maintain a clean, organized workspace so you don’t lose or confuse any components.
  • Apply enough heat to loosen adhesive but not enough to damage the device.
  • After separation, keep the back housing and screen in close proximity until all flex cables or other wire
    cables are disconnected.

iPod Touch 5th Gen Battery Replacement Steps

  1. Starting at the bottom near the home button, slide the corner of a razor blade in between the screen and the
    bottom frame to begin separating the screen from the body.
  2. Use the metal spudger to slowly and carefully separate the glass screen of the iPod from the body. Start on the
    bottom edge of the device and proceed slowly. Eight brackets connect the screen to the body.

  3. Continue using the metal spudger to gently separate the glass from the body up the sides and across the top. Don’t
    push too deeply towards the center of the device. When all the brackets have been pryed open, slowly pull the
    top of the screen away from the body.
  4. The home button is connected via an orange flex cable, so do not pull the back glass far from the frame.
    Disconnect the cable from the heat shield of the iPod.

  5. After disconnecting the home button flex cable, remove the eight screws from the silver heat shield and set to
    the side.

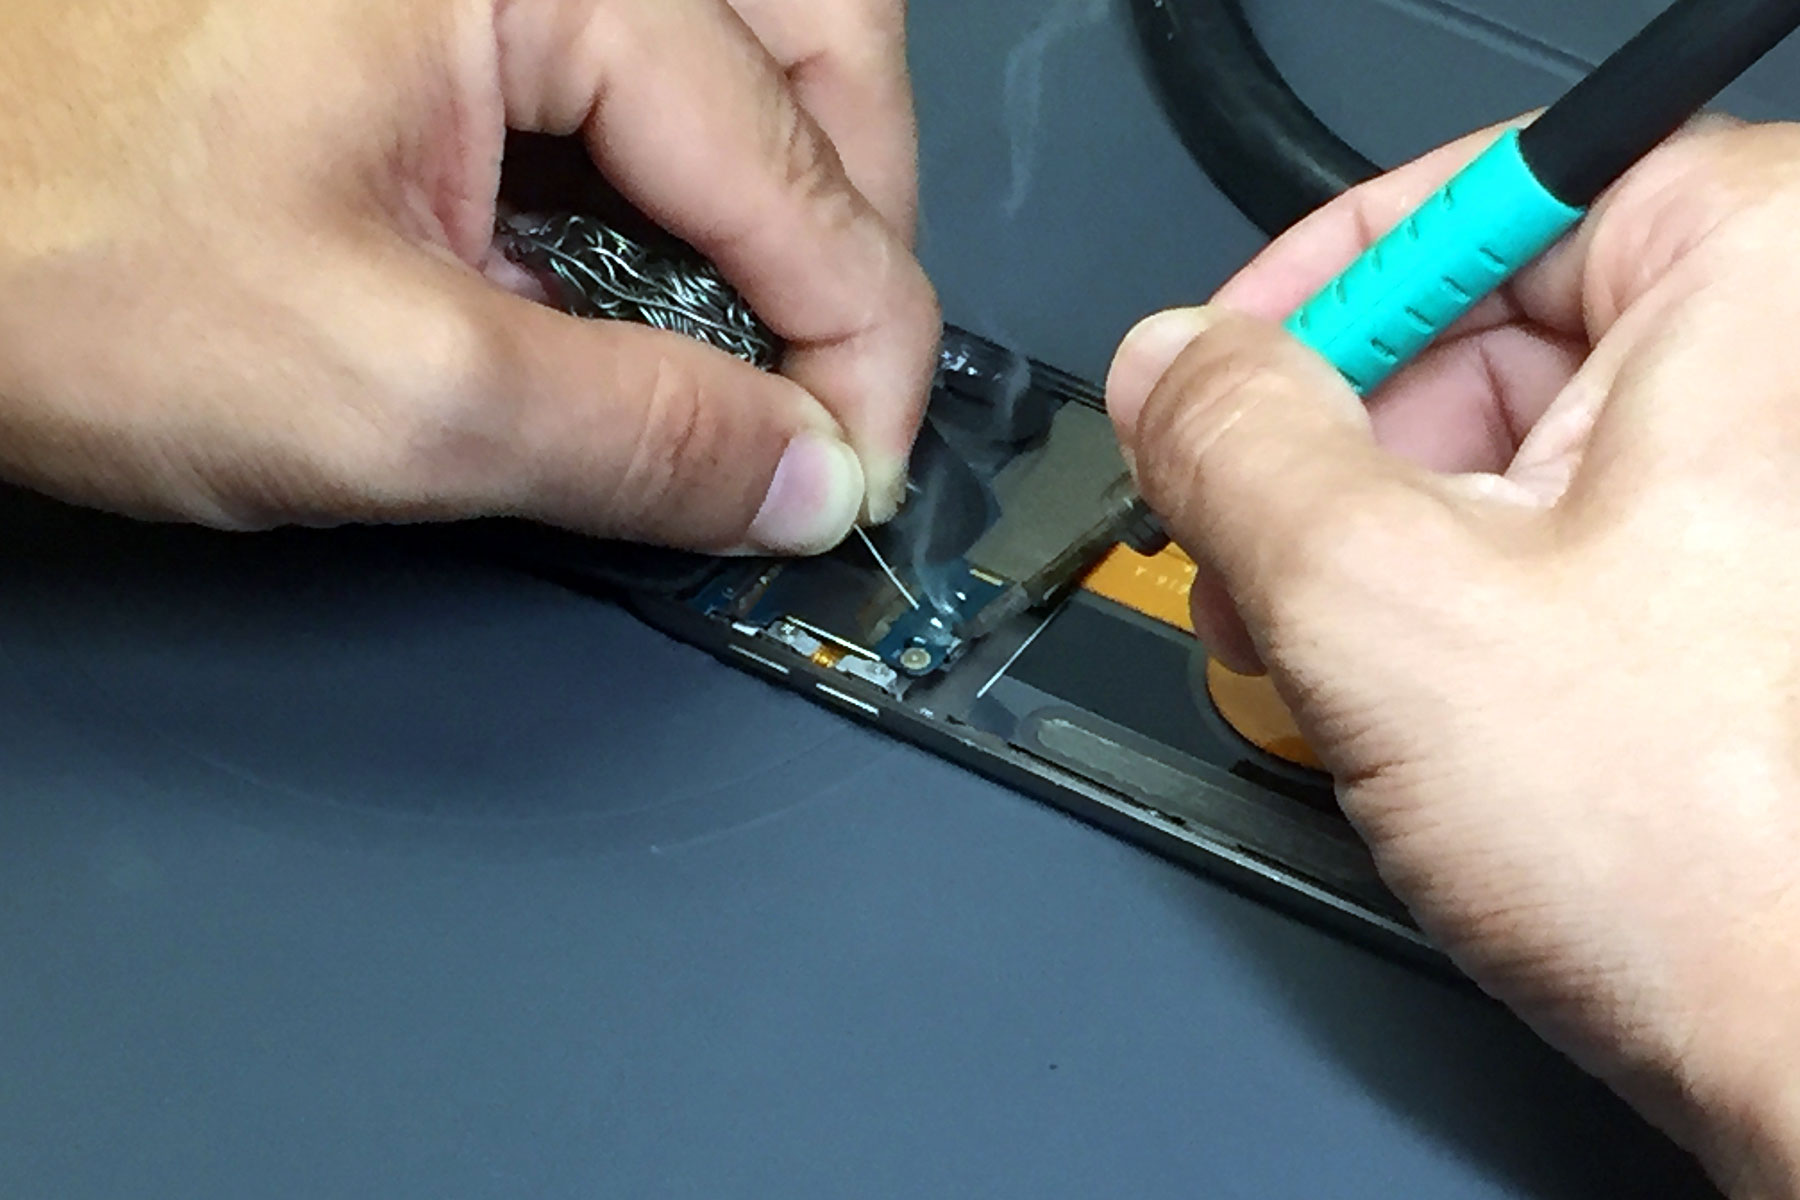
  6. The next steps involve removing the battery flex cable using a hot air rework station. Focus the heat on the
    black film and Kapton tape that needs to be removed while heating. This is located on the left side just above
    the battery.
  7. Once the cable can be removed, pop out the battery with a spudger.
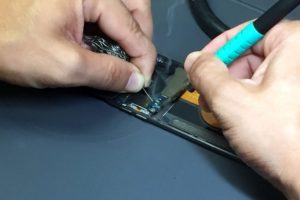
  8. The replacement battery must be soldered into place using a soldering iron, flux, and tweezers to hold the
    cable in place.
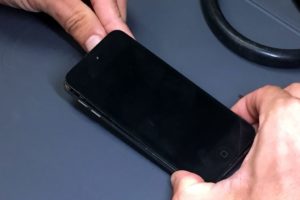
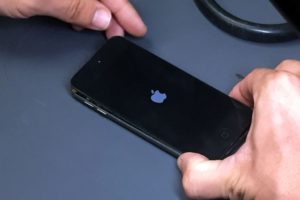
  9. With your new replacement battery connected, you should now be able to boot up the device. You can work
    backward from step 7 to complete the repair. Be sure to cover the new solder points with Kapton tape before
    reinstalling the heat shield. If Kapton tape is not added the heat shield could short out the device.

For Help, Repairs, or Parts

If you need parts or tools for this repair, or if this repair is too much to attempt on your own and you need
professional help with your iPod Touch Repair, contact iFixYouri at 888-494-4349 or www.ifixyouri.com.

Galaxy S8 Screen Teardown: How To

Introduction

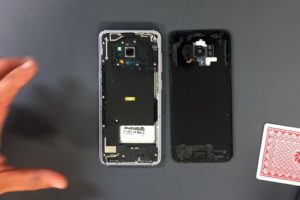
The Samsung Galaxy S8 screen is moderately difficult to tear-down. Proper attention should be given to safely loosening the adhesive strips with heat. Keep an eye out for the connector cable to the fingerprint sensor on the back panel, and the screen flex cable which feeds through an opening in the body. So let’s get to it! Look for the text directions below the video. Check out iFixYouri on youtube for more repair videos.

Tools Needed:

Recommended: Magnetic mat, screw capsules

General Repair Guidelines:

  • Always use good lighting – smart device components are small and you’ll need plenty of light to see what you are doing.
  • Maintain a clean, organized workspace so you don’t lose or confuse any components.
  • Apply enough heat to loosen adhesive but not enough to damage the device.
  • At any point during a repair, if the adhesive becomes hard to separate, apply more heat.
  • After separating adhesive, keep the back panel, housing, and screen in close proximity until you disconnect all flex cables or other wire cables.

Samsung Galaxy S8 Teardown Steps

Click an image to enlarge

Heat up the device’s interior adhesive strips with a dehydrator, heat gun, or heat mat. Heat guns provide a quick solution but use caution as it can be easy to overdo it and damage the device.

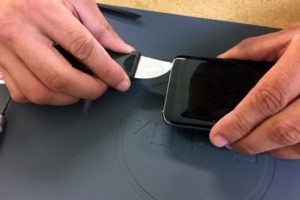
Use the metal spudger to slowly and carefully separate the back panel of the phone from the body. Start on the bottom edge of the device and proceed slowly.

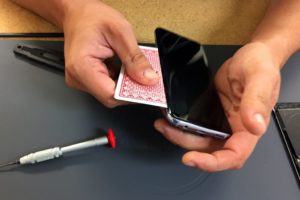
Continue using the metal spudger or use playing cards or guitar picks to gently separate the adhesive up the sides and top. Above all, don’t push too deeply towards the center of the device.

Disconnect the Sensor Cable

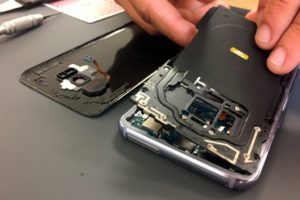
The rear fingerprint sensor connects to other components via an orange cable, so do not pull the back glass far from the frame. The cable can be disconnected from the back panel with a spudger.

Now you’ve disconnected the fingerprint sensor cable and separated the adhesive on all edges. After that, the back panel can be removed and set to the side.

Unscrew visible screw heads starting from the top. These connect the wireless charging assembly to the body. The three screws along the bottom do not require removal.

Galaxy S8 Screen removal step 5

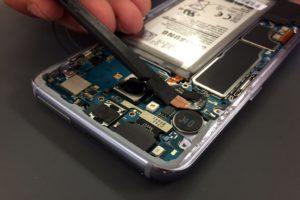
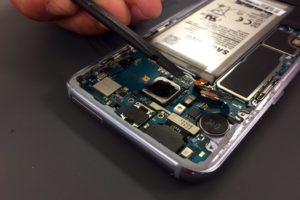
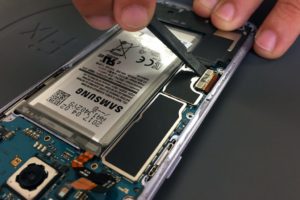
Set aside the wireless charging assembly. Using the spudger, disconnect the battery’s orange-colored flex cable which is connected to the logic board.

The screen connects to the board by an orange flex cable located near the edge of the phone. Disconnect it using a spudger.

Separating the Galaxy S8 Screen Adhesive

Removal of the Galaxy S8 screen may require reheating the adhesive. Slide the metal spudger between the screen and body. Gently slide along the bottom of the device, separating the adhesive.  WARNING: Be careful not to damage the flex cable on the right side of the phone. Do not pry too deeply into the device on the bottom or right side.

A plastic card can be used to separate the adhesive on the sides and top of the phone. However, you will have to angle the card to slide up the sides of the phone because of the glass curvature.

Watch that Flex Cable!

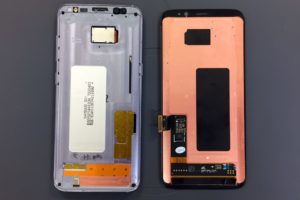
The screen’s flex cable feeds through a hole in the right side of the body (if you are looking at the screen). Take care when pulling the screen away from the body because there can be complications from rushing. For instance, the flex cable can get caught on the edge of the opening.

That’s it! You’ve removed the Samsung Galaxy S8 screen assembly. In conclusion, we hope you’ve learned something and had fun. You can do the removal steps in reverse if you are attempting to install a new screen assembly.

For Help, Repairs, or Parts

If you need parts or tools for this repair, or if this repair is too much to attempt on your own and you need a repair professional skilled at Samsung Galaxy S8 repair, contact iFixYouri at 888-494-4349 or www.ifixyouri.com.

When To Replace Your Phone’s Battery

Because of modern society’s love of smartphones, most of us keep a watchful eye on battery levels. When our phone’s power level is getting low, life can become a rush to find an outlet to charge back up so we can return to our interconnected day. As cell phone batteries age, they lose the ability to hold a charge and our outlet search anxiety becomes more frequent. But did you know there is also a safety risk involved with carrying around a phone with an old battery? Old batteries can expand, damaging the device they were meant to power, heat up, and sometimes even explode.

The Brief Life Story of a Battery

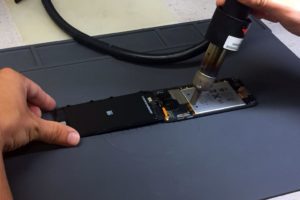
Rechargeable batteries may run for a long time but they do have a limited lifespan. iPhone batteries, for example, are good for roughly 600 charge cycles, after that performance starts to degrade, necessitating a battery replacement. Sometimes a replacement is required much earlier, such as when the unit routinely fails to charge, gets noticeably warmer, or runs out of power quickly.

What Causes Batteries To Explode?

Cell phone batteries are lithium ion batteries, which differ from the alkaline AA’s you have in your cable remote. Lithium-ion batteries are rechargeable and rely on the chemical lithium as their power source. Typically these are built directly into smartphones. Lithium-ions are a newer type of battery than alkalines and allow quite a bit more voltage. However, this increased power also increases some possibilities for combustion. Cheap manufacturing, rough treatment or impacts, overheating, or improper charging process (determined by device software, as well as accessories) can sometimes lead to a thermal runaway which concludes with a literal bang.

So How Do We Take Charge of Our Battery Life?

Always make sure to use high quality charging accessories. Many modern phones provide notifications when charging blocks are not the proper voltage. Pay attention to them. They do this to get the best performance and quality out of your battery. Avoid the super discount junk chargers found in gas stations and opt to purchase quality accessories from specialized phone companies, like iFixYouri.
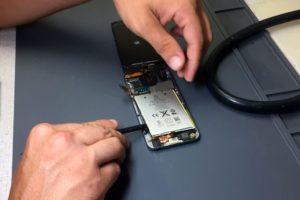
Owners may choose to replace batteries themselves as sometimes spare batteries are available online at reasonable prices. However, the benefit of bringing your phone with the old battery intact to a professional repair company like iFixYouri for battery replacement is that you can be sure a high-quality battery is installed correctly and comes with a warranty.

Why You Shouldn’t Buy Cheap Chargers

Beware of cheap chargers! It’s not just your phone you have to worry about blowing up on you (Sorry, Samsung). It’s safe to say that most of us have been caught in the wild without a charger and 2% battery and succumbed to the $8.99 iPhone charger at the gas station. You know the type; sold right next to the male-enhancement pills and questionable energy tonics, not the familiar clean white but instead a color that reminds you of bad candy. While these may be fine in a pinch, we recommend avoiding using these chargers regularly. Reports of fire, electrocutions, and (much worse) damage to phones have been widespread. These cheap chargers, sometimes blatant counterfeits designed to look similar to official accessories, are inexpensive for a reason. Let’s take a look at a MacBook charger, since its larger size makes things easier to see. The official Apple charger is on the left, the knockoff on the right.

macbook charger
Original vs. Cheap MacBook Charger

The biggest issue regarding the safety in these knockoff chargers has to do with insulation. These devices are designed to take a very powerful electrical current from your wall and convert it into something that can safely charge your laptop. As you can imagine, a lot of safeguards are required to prevent wires from crossing and to distribute the electrical load evenly. Those safeguards aren’t as numerous in the knockoff; you can see how much empty space there is compared to the official one. If you’re going to use one, make sure you’re not standing on a wet or metal floor or you might get a deadly surprise. Budget chargers for iPads and iPhones are similarly constructed: a housing the same size and shape as the official, but the electronics inside barely fill the space. Here’s another side-by-side with iPad chargers (counterfeit on the right)…

iPad Chargers
Original vs Cheap iPad Chargers

…and a $2.95 iPhone wall charger, looking like something from a vending machine.

Knockoff iPhone Charger

Now, we’re not saying all off-brand charging accessories are bad (but a lot of them are, according to the BBC). You can save money, but don’t be tempted to save more than 50% or you might be in trouble. An iPhone charger (wall plug and cable) retails for around $25 and good alternatives, such as PureGear or AmazonBasics, can be found for close to $15. These, of course, will be of a different external design than the official Apple product, but feature similar build quality and safety. Beware of products that make an attempt to look like exact copies of official products but have a price tag one-tenth the size; these are designed to trick you into buying an inferior counterfeit while thinking it’s legit, much in the way that Ghosthunters is titled to confuse people looking to rent Ghostbusters at the local RedBox. In the interest of safety, be sure to look for logos of product-quality organizations, such as UL, CSA, and CE.

ul-csa-logo

At iFixYouri retail locations, we sell a variety of accessories for your devices, from protective and decorative cases to chargers. Our stores carry PureGear chargers, all of which carry either the CSA or CE label and are touted by our expert technicians. If your device was damaged by a faulty charger, either a charging port malfunction or a battery that suddenly doesn’t hold a charge or dies suddenly, iFixYouri can diagnose the problem and repair it quickly and with top-quality parts. We might even throw in a quality charger, too!


Photo credits http://www.righto.com/

Reviews for iFixYouri West Palm Beach

Your Center for iPhone Repair & Tablet Repair in West Palm Beach

iFixYouri iPhone Repair West Palm BeachHere are some reviews for iFixYouri West Palm Beach, your source for professional tablet and smartphone repair. The reviews that follow come from our Yelp and Google+ pages and will give you an idea of our professional service, expertise and quality of work. These are from our actual customers.

I express gratitude for the kind, fast, professional, and cost effective service I received at iFixYouri (west palm beach, fl). The equipment and parts needed to repair my device were in-stock and available for immediate use!! I had my iPhone 5 repaired in 25 minutes. The price I paid for my new case was a steal!! I value my experience with iFixYouri in west palm beach, fl. 🙂


Awesome. saved me buying a new phone today. Great service, nice guys and a good deal.


I had an issue with my iPhone 3GS with what I thought was the battery not charging. I sent the phone in for diagnostic testing. It turned out that the dock (charging port) had gone out. iFixYouri could have fixed the phone, no problem, but they offered to buy the phone from me, so I decided to sell it to them for parts. I am very satisfied with how iFixYouri handled my particular situation. I highly recommend iFixYouri for all of your cell phone, iPad or iPod repairs. They are fast, knowledgeable and keep you informed of what the status is on your device. I will call on them again if the need should arise.

Beth Holt


I have maybe an unhealthy addiction to my iphone. I’m sure all other iphone owners do. so when I dropped my phone and the screen shattered I was devastated! I went to another local shop before I went to iFixYouri (sorry guys, this one was closer) and was not impressed at all. I didn’t even want to leave my phone with those people. so rude. I had seen iFixYouri on facebook so I decided to contact them. best thing I could have done! they were soo friendly, the shop is nice and clean, very professional, and they fixed my phone faster than I would have imagined it would take! such a deal too! Thank you iFixYouri!!! I will be recommending you to EVERYONE I know!


I have a white iPhone 5 and have gone to this location twice for help, both times A+ service!  I had visited some other local “iphone repair” companies with zero luck and horrible service!

I first visited about a month ago with a cracked screen. They quickly replace the screen while the other repair places said they didn’t have the parts.  The second time was to get the home button fixed, it had fallen off. At first I was told they did not have any white buttons but could either give me a black one or order one. When I went outside to call a friend to see what they thought I should do one of the employees overheard me and offered to give me his button (he also had a white iphone). I accepted the offer and they fixed it in 5 minutes and didn’t even charge me.

Fantastic service, friendly and very professional. Like I state earlier in this review, I’ve visited several other similar companies with zero luck.

Meaghan E.


This is a class operation. Fast & professional service. My IPhone was repaired perfectly with Apple parts. But the real story is the service. The USPS did not properly scan the item when iFixYouri was returning my phone. iFixYouri went to the Post Office to try and resolve the scan issue. This is above & beyond good service. My IPhone arrived the next day.


While I was in Florida having fun at the beach I almost lost my phone to the tide. I was able to save it, but it was soaked through. Took it to these guys and they had it back to me a few days later good as new. Way cheaper than buying out of my contract for a new phone. Shout out to Vince for being so awesome. He knows how to take care of a customer.

F. John R.


They did an absolutely amazing job replacing the screen and shattered glass on my Verizon iPhone 4. When I got it back from them (shipped to and from), it looked better than when I first got the phone. Thank you for doing what Apple considers “beneath them” and treating people right!

I have to give credit where it’s due, so I want to update my prior review and should have done so sooner.

I’ve been in contact with Chris from iFixYouri and not only did he give me a full refund for the cost of my diagnostics, but iFixYouri has actually changed their policy and no longer charges for diagnostics on a water damaged device if they are unable to successfully repair the device!

I was incredibly frustrated by initial experience with iFixYouri, but I’m blown away to see how committed this company is to satisfy customers and work out any kinks. I’ve never received such excellent customer service when dealing with an issue.

I wouldn’t hesitate to use iFixYouri in the future (which will probably be sooner than later, since our toddler just busted the screen on our new ipad :/ ) and feel more than comfortable recommending them to anyone who needs a device checked out. Their rates are more than fair and I know there is someone at the wheel who is striving to ensure customer satisfaction.

Thanks Chris, you definitely changed my mind about iFixYouri.

Ingrid L.


They had my iPhone screen repair done in about 10 minutes! Excellent service!
I love iFixYouri!!


I dropped my iPhone 4 in the pool in May, 2011. I immediately turned it off, stuck it in a bag of rice, then waited the suggested (by the community at large) 4 days, and nothing. Totally dead.

As everyone knows, AT&T is of no help in this area. My only choice was to buy a new iPhone 4 from them at the street price of $600.

I looked online and found iFixYouri.com, not far from where I live. Called them, got shipping instructions and shipped UPS which, since they’re close, was only one day. They kept it for several days, with constant — at least twice daily — emailed updates as to their progress.

It took a few days because, as it turns out, they had to replace almost every part in the iPhone. But they stuck to their $160 cap and overnighted the phone back to me. It was like a brand new phone (and I did not lose any of my data or settings.) I was extremely happy.

Two months later, my phone suddenly died in the middle of a call. I could not revive it (tried rebooting, hard resetting, recovery mode, syncing, etc…) Given the time that had gone by, I was doubtful that it could be a residual effect of the water damage, and worried about my options (again.) I called iFixYouri and without hesitation, they said I was still under their repair warranty. They immediately emailed me a prepaid return label. I sent the phone back to them and 24 hours later, they shipped me my repaired phone, again in brand new condition and with all of my data and settings intact.

Throughout the process their phone and repair people have been thoroughly knowledgeable and very friendly. I will continue to recommend them to many friends.

Jill P.