Category Archives: iPhone Repair

All posts related to iPhone Repair, including repair tips, specific iPhone generation repair details, iPhone parts, and repair news.

iPod Stuck on the Apple Logo? Here’s What to Do

You press the power button on your old iPod, expecting your music library to appear.

Instead, you see the Apple logo.

And then… nothing.

Maybe the logo stays on the screen indefinitely. Maybe the iPod restarts and shows the Apple logo again. Or perhaps it gets stuck in an endless cycle of turning on, displaying the logo, shutting down, and starting over.

If your iPod is stuck on the Apple logo, don’t assume it’s permanently dead.

An iPod can get stuck during startup because of something relatively simple, such as a depleted battery or software problem. However, older iPods can also develop hardware problems involving the battery, hard drive or flash storage, cables, or logic board.

The good news is that many older iPods are still repairable.

Before you start taking yours apart, here’s what you should know.


Why Is My iPod Stuck on the Apple Logo?

When an iPod displays the Apple logo, it has successfully started part of the boot process. The problem is that it isn’t successfully completing startup.

That distinction is useful.

An iPod that displays absolutely nothing may have a power, battery, display, or board problem. An iPod that reaches the Apple logo has gotten further, which gives you additional clues.

Depending on the model, common causes include:

  • A depleted or failing battery
  • Corrupted software or firmware
  • A failing hard drive
  • Damaged or disconnected storage cables
  • Flash-storage problems on modified iPods
  • A logic-board problem
  • A failed connection between internal components
  • Previous liquid or physical damage

For older iPod Classic models, storage problems can be particularly important because many generations used miniature mechanical hard drives.

Repair troubleshooting resources identify failed storage, cables, battery connections, and logic-board problems among potential causes of iPod startup failures.

For Example

Imagine an iPod Classic that has been sitting in a drawer for several years.

The battery is severely depleted. You plug it in, and eventually the Apple logo appears—but the iPod never reaches the menu.

That doesn’t necessarily mean the storage has failed. The battery may simply be unable to provide enough power to complete startup.

Now imagine another iPod that reaches the Apple logo, makes repeated clicking noises, and continually restarts.

That’s a very different clue.

The storage device may be having trouble initializing.


What Should I Do If My iPod Is Stuck on the Apple Logo?

Start with the least invasive troubleshooting steps.

You don’t want to open an old iPod unnecessarily, particularly if you have valuable music, photos, recordings, or other data stored on it.

Give the iPod time to charge

Connect the iPod to a known-good charging cable and power source.

If the battery has been completely depleted, give it some uninterrupted charging time before repeatedly trying to restart it.

Older batteries can also deteriorate while sitting unused. Apple notes that rechargeable batteries have a limited lifespan and eventually may require service.

If the iPod repeatedly starts, shows the Apple logo, and shuts back down, a failing battery becomes more suspicious.

Real-world example: An iPod that has spent five years in a desk drawer may appear completely dead or repeatedly reboot because its aging battery can no longer sustain the power required during startup.


How Do You Force Restart an iPod?

If charging doesn’t solve the problem, the next step is a force restart.

The exact button combination depends on the iPod model.

iPod Classic

For an iPod Classic, Apple recommends:

  1. Make sure the Hold switch is unlocked.
  2. Press and hold Menu and the Center/Select button.
  3. Continue holding them for approximately eight seconds.
  4. Release them when the Apple logo appears.

Apple specifically recommends trying the reset with the iPod sitting on a table and avoiding contact with the Click Wheel while pressing the buttons.

Older iPod Nano models

The procedure varies by generation.

For example, Apple recommends Menu + Center/Select for iPod Nano models through the fifth generation, while the sixth and seventh generations use different button combinations.

iPod Touch

iPod Touch models also use different force-restart combinations depending on generation.

For example, sixth-generation and earlier iPod Touch models use the Home + Top buttons, while the seventh generation uses Top + Volume Down.

The important point: Don’t assume every iPod uses the same reset procedure.

If you aren’t sure which model you have, identify the model before attempting additional troubleshooting.


What If My iPod Keeps Showing the Apple Logo?

If the Apple logo disappears and then comes back repeatedly, you may be dealing with a boot loop.

A boot loop means the iPod begins startup but fails before reaching the normal operating screen. It then restarts and attempts the process again.

This can happen because the iPod cannot successfully initialize something it needs during startup.

Possible causes include:

  • Weak or failing battery
  • Corrupted software
  • Storage failure
  • Hard-drive cable problems
  • Logic-board failure
  • Internal connection problems

For older iPod Classics, the storage device deserves particular attention.

An iPod Classic with a mechanical hard drive needs that drive to initialize correctly during startup. If it cannot read the necessary information, the device may fail to progress beyond the Apple logo.

Listen carefully

With some older hard-drive-based iPods, sounds can provide useful clues.

A healthy mechanical drive may produce a relatively smooth spinning sound. Repeated clicking, grinding, or unusual noises can indicate a drive problem.

However, don’t shake, tap, hit, or repeatedly drop the iPod to try to make the drive work.

That can turn a recoverable problem into a worse one.


Could the Battery Cause an iPod to Get Stuck on the Apple Logo?

Yes.

A weak battery can create confusing symptoms.

An iPod may have enough power to illuminate the display and show the Apple logo but not enough stable power to finish starting up.

This can produce symptoms such as:

  • Apple logo appears and disappears
  • iPod repeatedly restarts
  • iPod works only when connected to power
  • iPod shuts down shortly after starting
  • iPod refuses to complete startup
  • Battery indicator behaves strangely

Older iPods are especially susceptible because many are now well beyond the expected service life of their original batteries.

Apple explains that rechargeable batteries have finite lifespans and that increased charging frequency can indicate that a battery needs service.

A real-world example

Suppose your iPod works normally while connected to a charger but immediately restarts when disconnected.

That points strongly toward a power or battery problem rather than simply assuming the operating system is corrupted.

A battery replacement may restore normal operation.


Could a Bad Hard Drive Cause the Apple Logo to Freeze?

Yes—especially on older iPod Classic models.

Several generations of iPod Classic used small mechanical hard drives. Like any mechanical storage device, those drives can eventually wear out.

An iPod with a failing hard drive may:

  • Freeze at the Apple logo
  • Restart repeatedly
  • Display a folder icon
  • Become extremely slow
  • Fail to connect properly to a computer
  • Make unusual clicking sounds
  • Stop recognizing its music library

Troubleshooting documentation for iPod Classic models identifies bad hard drives and hard-drive cables as possible causes of startup and folder-icon problems.

Why the hard drive matters

Your iPod isn’t simply turning on a screen.

During startup, it needs to initialize its internal system and access the information stored on its storage device.

If that process fails, the iPod may stop at the Apple logo.

Real-world example: An older 80GB iPod Classic may show the Apple logo every time you start it but never reach the menu. If the drive is failing, replacing the battery alone won’t solve the underlying problem.

That’s why diagnosis matters.


What If My iPod Shows a Folder Icon After the Apple Logo?

A folder icon is another useful diagnostic clue.

On some older iPod models, a folder icon can indicate a storage-related problem.

Potential causes include:

  • Failed hard drive
  • Bad hard-drive cable
  • Corrupted software
  • Internal connection problems

If the iPod quickly changes from the Apple logo to the folder icon, the cable or storage connection may deserve investigation. If it remains on the Apple logo for longer before displaying the folder, the storage device itself may be failing.

Don’t automatically assume that every folder icon means the same thing, though.

The exact symptoms depend on the iPod generation.


Should You Restore an iPod That Is Stuck on the Apple Logo?

Be careful before choosing Restore.

A restore can resolve software problems, but it can also erase the contents of the iPod.

That matters if your iPod contains music, photos, recordings, or other files that don’t exist somewhere else.

Troubleshooting documentation warns that restoring an iPod erases its contents.

When is a restore appropriate?

A restore may make sense when:

  • You have a backup of your important data
  • The iPod is recognized by your computer
  • Hardware appears to be functioning normally
  • Software corruption is suspected
  • You’ve already ruled out obvious battery and hardware problems

When should you avoid restoring?

Be more cautious if:

  • The iPod contains irreplaceable music or recordings
  • You don’t have another copy of the data
  • The computer doesn’t recognize the device
  • The iPod makes unusual mechanical noises
  • The iPod repeatedly disconnects
  • The problem appears to be hardware-related

If the data matters, don’t make the restore your first move.


When Should You Stop Troubleshooting and Get Professional iPod Repair?

Sometimes the smartest troubleshooting step is knowing when to stop.

Consider professional repair if your iPod:

  • Remains stuck on the Apple logo after charging and resetting
  • Repeatedly enters a boot loop
  • Shows a folder or error screen
  • Makes clicking or grinding sounds
  • Won’t stay powered on
  • Isn’t recognized by your computer
  • Has a swollen or damaged battery
  • Has been exposed to liquid
  • Has suffered a drop or impact
  • Contains important data you don’t want to risk losing

Opening an iPod can be considerably more complicated than opening a modern device designed for easy service.

Older iPods can contain tightly packed components, delicate connectors, small screws, adhesive, and batteries that require careful handling.

Why diagnosis matters

The biggest mistake is replacing the wrong part.

For example:

Symptom: Apple logo, then reboot.

Possible assumption: “The hard drive is dead.”

Actual problem: The battery can’t maintain sufficient voltage during startup.

Or:

Symptom: Apple logo, then folder icon.

Possible assumption: “The software is corrupted.”

Actual problem: The storage cable or hard drive has failed.

A professional diagnosis helps distinguish these situations before you spend money on unnecessary parts.


Is It Worth Repairing an iPod Stuck on the Apple Logo?

For many owners, yes.

An old iPod isn’t necessarily valuable because of its resale price.

It may contain a music collection you’ve built over decades. It might be a favorite travel companion. It may be a collectible. Or perhaps you simply prefer having a dedicated music player without notifications, social media, and other distractions.

Repair can also be a practical alternative to replacing an increasingly rare device.

There is a broader environmental argument, too. The United Nations’ Global E-waste Monitor reported that the world generated 62 billion kilograms of electronic waste in 2022, while only 22.3% was documented as formally collected and recycled.

Keeping a repairable electronic device in use longer is one small way consumers can avoid unnecessary replacement.

Imagine someone has an iPod Classic they’ve owned since college.

The device isn’t worth much as a generic used MP3 player—but the music library and memories associated with it are priceless to that owner.

A battery, storage, or other repair could bring that same device back into service without replacing it with a completely different product.

That’s often what makes vintage-device repair worthwhile.


What Repairs Can Fix an iPod That Won’t Boot?

The appropriate repair depends on the diagnosis.

Repairable iPod Problems

Common iPod repairs can include:

Battery replacement

A new battery can resolve startup problems caused by an aging or failed battery.

Hard-drive or storage repair

Older iPod Classics may require hard-drive service or storage replacement.

Some owners also modify compatible iPods with flash storage, but compatibility and installation requirements vary by model.

Cable and connector repair

A damaged or poorly connected internal cable can prevent the iPod from communicating with its storage or other components.

Logic-board repair

If the problem originates on the main board, more advanced repair or board replacement may be necessary.

Charging-port repair

A damaged connector can prevent the battery from receiving enough power to operate normally.

Click Wheel repair

A malfunctioning Click Wheel can create startup and control problems on affected models.

iFixYouri currently offers a range of iPod repairs across Classic, Nano, Mini, and Touch models, including battery, Click Wheel, headphone jack, power, volume, screen, and charging-port repairs.


How Can You Avoid Making the Problem Worse?

If your iPod is stuck on the Apple logo, resist the urge to immediately start disassembling it.

Instead:

  1. Identify the iPod model.
  2. Check the Hold switch.
  3. Connect it to a known-good power source.
  4. Give it adequate time to charge.
  5. Perform the correct force restart for your model.
  6. Observe what happens during startup.
  7. Listen for unusual hard-drive noises if your model has a mechanical drive.
  8. Check whether a computer recognizes the iPod.
  9. Avoid restoring it if you need the data and don’t have a backup.
  10. Seek professional diagnosis if the problem continues.

This approach gives you useful information without immediately risking the device or its contents.


Don’t Give Up on Your iPod Yet

Seeing an Apple logo frozen on an old iPod can make it look like the device has reached the end of its life.

But the Apple logo is only part of the story.

A failing battery, storage problem, corrupted software, cable issue, or logic-board problem can all produce confusing startup symptoms. The right solution depends on the model and the exact behavior of the device.

If charging and a proper force restart don’t solve the problem—or if your iPod contains data you don’t want to risk losing—professional diagnosis is the safer next step.

iFixYouri Smart Device Repair specializes in repairing older electronics and offers iPod repair services for numerous generations and models.

Your iPod may not be finished just because it won’t get past the Apple logo.


FAQ

Why is my iPod stuck on the Apple logo?

An iPod can become stuck during startup because of a depleted or failing battery, corrupted software, storage failure, a damaged cable or connector, or a logic-board problem. The exact cause depends on the iPod model and its symptoms.

How do I fix an iPod stuck on the Apple logo?

First, make sure the Hold switch is unlocked and charge the iPod using a known-good power source. Then try the appropriate force-restart procedure for your model. If it remains stuck, professional diagnosis may be necessary.

How do I reset an iPod Classic stuck on the Apple logo?

Unlock the Hold switch, then press and hold the Menu and Center/Select buttons for about eight seconds until the Apple logo appears. Apple recommends performing the reset with the device on a table and avoiding contact with the Click Wheel while pressing the buttons.

Why does my iPod keep restarting at the Apple logo?

Repeatedly showing the Apple logo and restarting is commonly described as a boot loop. Possible causes include a weak battery, software problems, storage failure, or other hardware issues.

Will restoring my iPod fix the Apple logo problem?

A restore can resolve some software problems, but it erases the contents of the iPod. If your music, photos, or other data aren’t backed up, don’t restore the device until you’ve considered the possibility that the problem is hardware-related.

Is an iPod stuck on the Apple logo worth repairing?

Often, yes. Repair can be particularly worthwhile for cherished, collectible, or difficult-to-replace iPods. A professional diagnosis can determine whether the problem is a relatively straightforward battery or storage repair or something more extensive.


Experience & Expertise

Why Choose iFixYouri Smart Device Repair?

When an older iPod stops booting, experience matters.

iFixYouri Smart Device Repair has been repairing electronics since 2010, and its technicians have experience working with a wide range of iPod generations and repair problems.

The goal isn’t simply to replace a part and hope for the best. A careful repair process starts with diagnosis, identifies the likely source of the failure, and then determines whether the device can realistically be restored.

That’s particularly important with vintage iPods.

A device may have a failing battery, hard drive, connector, display, Click Wheel, or logic board—and several of those problems can produce similar symptoms.

iFixYouri offers iPod repair through walk-in locations as well as mail-in service, giving customers options depending on where they live.

For local customers, iFixYouri also provides iPod repair in the Palm Beach Gardens area.

If your favorite iPod is stuck on the Apple logo, don’t assume it’s ready for the recycling bin. A proper diagnosis may be all it needs to get back to your music.

Sources

Apple Support — Learn how to force restart your iPod (https://support.apple.com/en-us/102293)

Apple Support — Apple Service and Repair for iPod (https://support.apple.com/ipod/repair)

Apple — Batteries: Service and Recycling (https://www.apple.com/batteries/service-and-recycling/)

ITU / UNITAR — The Global E-waste Monitor 2024 (https://www.itu.int/en/ITU-D/Environment/Pages/Publications/The-Global-E-waste-Monitor-2024.aspx)

iFixYouri — iPod Repair Services (https://www.ifixyouri.com/pages/ipod-repair)

iFixYouri — Palm Beach Gardens Repair (https://www.ifixyouri.com/pages/palm-beach-gardens)

Cracked iPhone Screen? Here’s Why You Shouldn’t Wait to Get It Repaired

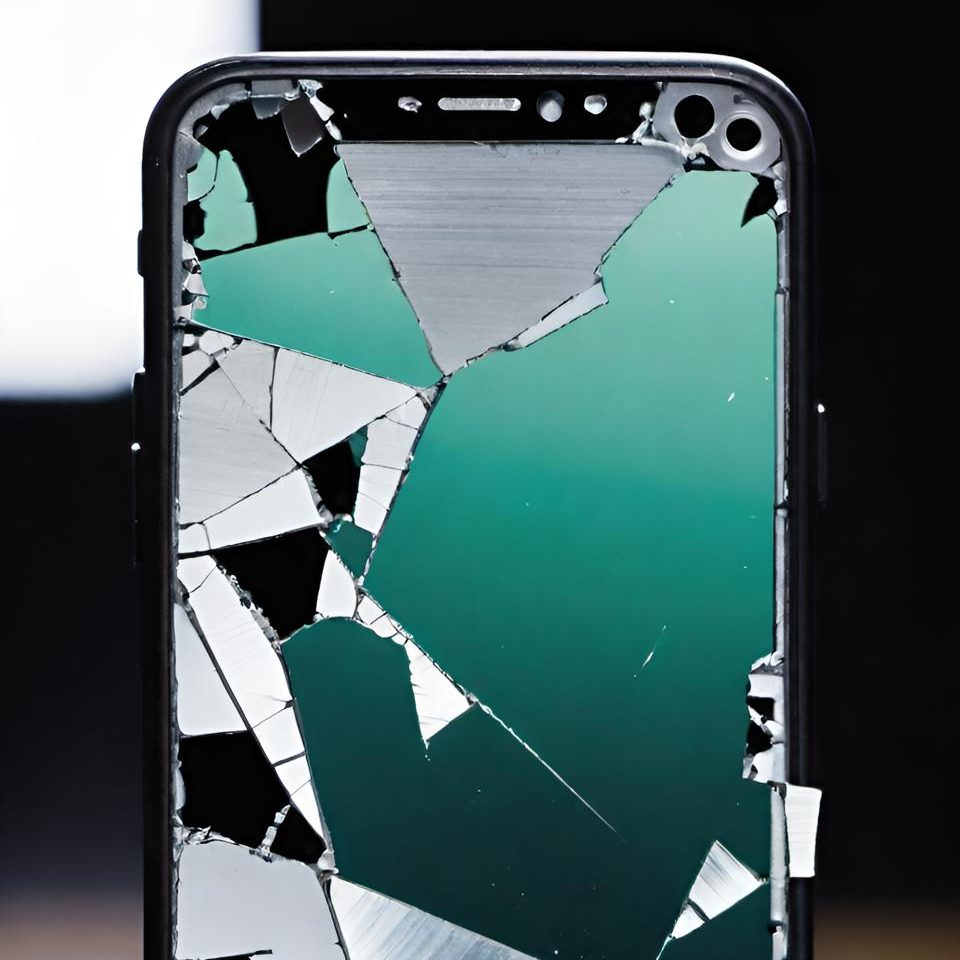
    Your iPhone screen isn’t just a display—it’s your gateway to texting, making calls, checking emails, and scrolling through social media. However, when that screen cracks, it quickly turns into a frustrating obstacle.

    Why You Shouldn’t Wait to Repair Your Cracked iPhone Screen

    1. Damage Gets Worse: At first, a small crack might seem like no big deal, but it can quickly spread. Everyday actions like putting your phone in your pocket or accidentally dropping it can cause the crack to grow. Eventually, your phone could become unusable and internal components can become damaged as well.
    2. Touch Sensitivity Suffers: Additionally, your iPhone’s touch screen is highly sensitive. When cracks interfere with its performance, you may experience unresponsive areas or phantom touches (when the screen reacts to touches that didn’t happen). As a result, this reduces your phone’s functionality and leads to even more frustration.
    3. Water and Dust Sneak In: Furthermore, even a hairline crack can expose your phone’s internal components to moisture and debris. Over time, this exposure can lead to serious hardware issues, such as water damage, which requires additional cost to fix than a simple screen replacement.
    4. Resale Value Drops: If you’re planning to upgrade soon, a cracked screen will significantly lower your device’s resale value. By getting it repaired now, you’ll help ensure you can sell or trade it in for a better price.

    At iFixYouri, we specialize in quick, affordable iPhone screen replacements backed by a warranty – 1 year for third-party glass and 90-days for Apple OEM (for select models). So, don’t let a small crack turn into a bigger headache. Bring your phone to us, and we’ll have it looking and functioning like new.

    Replacing or Repairing a Broken MacBook Keyboard

    A broken MacBook keyboard can be frustrating, whether you’re a student, a professional, or rely on your device for everyday tasks. At iFixYouri, we understand how important a fully functional keyboard is. In this post, we’ll explore the challenges of dealing with a broken MacBook keyboard, the steps to repair or replace it, and why professional repair makes sense.

    You may also want to check out our post about MacBook Screen Repair.

    broken macbook keyboard

    Common Challenges with a Broken MacBook Keyboard

    Key Malfunction

    Unresponsive keys are a common problem, often caused by physical damage, debris, or internal hardware issues. This quickly disrupts productivity.

    Sticky or Jammed Keys

    Spills or debris under the keys often lead to sticky or jammed keys. Attempting to clean it yourself can easily worsen the situation.

    Repeating Keys

    When a key repeats itself after one press, hardware issues are usually the culprit. DIY solutions often don’t fix this effectively and can cause more harm.

    Butterfly Keyboard Design Issues

    Butterfly and scissor keyboards are two distinct designs used in MacBooks. The butterfly keyboard, introduced by Apple in 2015, has a lower profile and uses a butterfly-shaped mechanism, allowing for thinner laptops. However, it’s prone to failure due to dust and debris easily getting trapped under the keys, causing them to stick or become unresponsive.

    In contrast, the scissor keyboard, which Apple reintroduced in 2020, features a more reliable and traditional scissor-like mechanism that offers more key travel, durability, and is less susceptible to debris, making it more robust and user-friendly.

    Complete Keyboard Failure

    Total keyboard failure usually points to motherboard issues or severe liquid damage, requiring a more in-depth repair.

    The Repair and Replacement Process

    At iFixYouri, we’ve developed an efficient process for MacBook keyboard repairs and replacements.

    Free Diagnosis

    We start by identifying the issue, looking for physical damage, liquid exposure, or internal hardware problems. Accurate diagnosis ensures we fix the right issue, whether it’s the keyboard or another component.

    Keyboard Cleaning

    In cases of sticky or jammed keys, thorough cleaning can often solve the problem. Our team uses specialized tools and techniques to safely remove debris or liquid residue.

    Key Replacement

    If only a few keys malfunction, we replace those individual keys. This saves time and money compared to replacing the entire keyboard.

    Keyboard Replacement

    For significant damage, we replace the entire keyboard. On older models, this process is straightforward. For newer models with integrated butterfly keyboards, we often need to replace the entire top case, which includes the keyboard, battery, and trackpad.

    Testing

    After completing the repair or replacement, we test each key to ensure full functionality. This step guarantees that the device performs well under normal usage conditions.

    Why Choose Professional Keyboard Repair at iFixYouri?

    Expert Technicians

    Our technicians have the experience and tools to handle delicate MacBook keyboards, ensuring repairs don’t cause further damage.

    High-Quality Parts

    We use only high-quality parts, ensuring your keyboard feels and functions like the original. If we replace the top case, we maintain the quality of your entire device.

    Quick Turnaround

    We understand how important your MacBook is, and we prioritize fast, efficient repairs without compromising quality.

    Cost Savings

    Repairing or replacing the keyboard costs much less than buying a new MacBook. We provide honest quotes upfront, so you know exactly what to expect.

    Extended Device Life

    A properly repaired keyboard adds years to your MacBook’s life. You avoid the cost and hassle of purchasing a new device by opting for professional repair.

    A broken MacBook keyboard doesn’t mean the end of your device. iFixYouri offers expert diagnostics, repairs, and replacements to get your MacBook back to peak performance.

    With high-quality parts, skilled technicians, and a commitment to quick service, we ensure your keyboard works like new. Don’t let a faulty keyboard slow you down—contact us today for a free diagnosis!

    Screen Cracked? Here’s What You Should Know About Chromebook Screen Repair

    Cracked Chromebook screens can quickly disrupt your day, whether the damage is caused by an accidental drop, pressure on the display, or regular wear and tear. When your screen cracks, frustration sets in fast—especially if you rely on your Chromebook for work, school, or entertainment. Fortunately, iFixYouri offers quick and affordable screen repair services, ensuring your device looks and functions like new without delay.

    Cracked Chromebook screens

    Why You Should Choose Professional Chromebook Screen Repair

    Although DIY repair videos may tempt you, it is best to leave Chromebook screen repair to professionals. Here’s why:

    1. Technical Expertise: Chromebooks contain delicate components that require precise handling. At iFixYouri, our skilled technicians specialize in Chromebook models and replace screens with expertise, ensuring a perfect fit every time.
    2. High-Quality Parts: iFixYouri only uses the highest-quality replacement screens. In contrast, lower-quality parts can cause display issues and touch sensitivity problems down the line, so it’s crucial to use the best.
    3. Warranty Protection: We proudly offer warranties on all our repairs. If something goes wrong after we’ve repaired your screen, we’ll fix it at no additional cost, giving you peace of mind.
    4. Time-Saving Convenience: DIY repairs often consume hours, with no guarantee of success. Instead of wasting time, our expert technicians can complete most Chromebook screen repairs in just a few hours once we have the part, saving you from frustration and delays.

    What You’ll Experience with iFixYouri’s Cracked Chromebook Screen Repair

    At iFixYouri, we aim to make the repair process smooth and efficient. Here’s what you can expect when you bring your cracked screen to us:

    1. Quick Diagnostics: First, we’ll assess the damage and determine whether your screen needs a full replacement or if other repairs are necessary. We keep you informed at every step, so you always know what’s happening.
    2. Fast Turnaround: We understand how much you rely on your Chromebook. That’s why we prioritize quick repairs—most screen replacements can be completed the same day once we receive the part. You’ll be back to your routine in no time.
    3. Affordable Pricing: Repairing a cracked Chromebook screen is much cheaper than buying a new device. With iFixYouri, you’ll benefit from competitive, transparent pricing—no surprises when it’s time to pay.
    4. Outstanding Customer Service: At iFixYouri, we pride ourselves on exceptional customer service. Whether you need repair advice or tips on protecting your screen, our friendly team is always ready to help.

    How to Protect Your Chromebook Screen After Repair

    Once we repair your screen, taking a few preventative steps will help extend its lifespan:

    • Use a Screen Protector: Installing a tempered glass or plastic screen protector adds a layer of protection, reducing the risk of future scratches or cracks.
    • Invest in a Protective Case: A sturdy case helps prevent damage from drops or impacts, keeping your Chromebook safe wherever you go.
    • Handle with Care: Avoid placing heavy objects on top of your Chromebook and take extra care when packing it in bags or backpacks to prevent accidental damage.

    Rely on iFixYouri for All Your Chromebook Screen Repair Needs

    A cracked Chromebook screen doesn’t have to mean the end of your device. By choosing iFixYouri, you’re ensuring a fast, affordable, and reliable Chromebook repair that gets your device back in working order. Whether you’re a student, a professional, or just a casual user, we’ve got the tools and expertise to restore your Chromebook to perfect condition.

    So, if your Chromebook screen is cracked, don’t wait—contact iFixYouri today, and let us handle it!

    Choosing an iPhone Repair Shop in Jupiter: Questions to Ask

    If you need iPhone repair in Jupiter, start with the details of your device and the problem. A useful estimate should explain what is being repaired, which parts are included, how long the work is expected to take, and what happens if testing reveals another issue. This guide is published by iFixYouri to help you prepare for a repair visit.

    Describe the problem before comparing quotes

    Tell the shop your iPhone model, what stopped working, and when it started. Mention drops, liquid exposure, previous repairs, or symptoms that come and go. A cracked screen and a display that stays black may require different work, even on the same model.

    Ask whether the quote covers a confirmed repair or whether the phone needs diagnosis first. Find out if there is a diagnostic charge, whether it applies toward the repair, and whether you will be contacted before additional work is performed.

    Ask what parts and testing are included

    Ask the technician to identify the part option in the estimate and explain any differences in price, features, or availability. Do not assume every quote uses the same part. If genuine Apple parts are important to you, confirm availability for your exact model and repair before approving the work.

    Ask what will be tested before pickup. Depending on the repair, that may include touch response, charging, cameras, speakers, or other affected functions. Describe any existing problems so both you and the shop have a clear starting point.

    Confirm timing and written coverage

    Get an estimated completion time based on your phone’s condition and current part availability. Ask whether the part is in stock and how you will receive updates. A simple repair and a liquid-damage diagnosis should not be treated as the same job.

    Request the repair warranty terms in writing, including the duration, what is covered, and any exclusions. If your phone has existing manufacturer or insurance coverage, check that provider’s service requirements before choosing a repair route.

    Prepare for your visit

    Back up your phone if it is working normally. Note the symptoms and bring the charging cable or accessory if it appears connected to the problem. Tell the shop if preserving photos or other data is your main priority.

    Ask which device settings or access are needed for testing and why. Do not send account passwords by email or text. If your phone is not working, explain that before attempting resets or other steps that could affect your data.

    Visit iFixYouri in Jupiter

    For our current service information, visit iPhone repair in Jupiter. Call with your model and symptoms to discuss the next step. Repair options, pricing, and timing depend on the device and diagnosis.

    iFixYouri Jupiter
    5500 Military Trail, Suite 32, Jupiter, FL 33458
    (561) 619-6600
    Walk-ins are welcome. Check store hours and directions before visiting.

    For routine care between visits, use our after-the-beach iPhone maintenance checklist.

    iPhone Care After a Beach Day in Jupiter: A Maintenance Checklist

    After a day at the beach in Jupiter, check your iPhone before putting it on the charger or back in its case. Sand, damp pockets, and sunscreen residue are easier to notice when you take a moment to look. This checklist covers routine care for a phone that is working normally. If it was submerged or is malfunctioning, stop routine cleaning and seek advice.

    1. Check the phone before connecting a cable

    Look at the outside of the phone and the charging connector for visible moisture or trapped grit. Do not force a charging cable into a blocked port. If the phone displays a liquid-detection warning, disconnect the cable and follow Apple’s liquid-detection guidance. Do not override the warning just to test whether charging works.

    A phone that feels unusually hot should have time to cool before you charge or use it again. For heat, rain, and saltwater precautions, see our guide to protecting your iPhone from the elements in Jupiter.

    2. Clean the exterior gently

    Disconnect cables and turn off your iPhone. Use a soft, slightly damp, lint-free cloth on the exterior, keeping moisture out of openings. Do not use compressed air or abrasive cleaners. Follow Apple’s cleaning and handling instructions for your device rather than mixing a homemade cleaning solution.

    If you see grit, avoid rubbing it across the screen. Do not insert pins, brushes, cotton swabs, or other objects into the connector. Visible debris lodged inside a port is a reason to have it inspected, not to push harder with a cable.

    3. Inspect the case and storage pouch

    Remove the case and check for sand or moisture trapped between it and the phone. Clean the case according to its manufacturer’s instructions and let it dry before refitting it. Replace a case with broken corners or a damaged seal. A case that looks protective does not necessarily provide water protection.

    Empty sand from the bag or pouch you use for your phone. Keep the phone separate from damp towels and swimwear. Check that the pouch closes properly before your next outing.

    4. Note changes instead of repeatedly testing a problem

    If the phone is dry and behaving normally, use it as usual. Pay attention to new charging interruptions, muffled sound, touch problems, or unexpected shutdowns. Write down when a symptom started and what the phone was exposed to. That history helps a technician assess the problem.

    Do not assume that every issue is caused by coastal humidity. A worn cable, damaged connector, battery problem, or software issue can produce similar symptoms. An inspection can help identify the cause before you decide on a repair.

    5. Keep a backup and know when to seek service

    Make checking your latest backup part of your normal phone-care routine while the phone is working properly. If a phone stops working after exposure to water, do not repeatedly power it on to attempt a backup. Tell the repair team if recovering photos or other data is your priority.

    For persistent problems, see our Jupiter iPhone repair services. We can discuss the symptoms and the next step with you.

    iFixYouri Jupiter
    5500 Military Trail, Suite 32, Jupiter, FL 33458
    Call (561) 619-6600. Walk-ins are welcome. See store details and hours before visiting.

    Protecting Your iPhone from the Elements in Jupiter, FL

    A beach day in Jupiter can expose your iPhone to direct sun, saltwater, and sand. A few practical precautions can help you avoid a charging problem or damaged screen. Here is what to do before heading out, and what to do if your phone gets wet or overheats.

    Keep your iPhone out of direct heat

    Do not leave your phone on a beach towel in direct sunlight or inside a parked car. Keep it shaded when you are not using it. Navigation, video recording, and charging can add heat, so pause those activities if the phone becomes unusually hot.

    If a temperature warning appears, stop using the phone, turn it off, and move it to a cooler place away from direct sunlight. Let it cool naturally before using it again. See Apple’s temperature guidance for more detail.

    Protect against rain and saltwater

    Keep your phone away from the surf and use a properly sealed protective pouch when you need it near water. Check the pouch before each outing. Do not assume your phone or case is waterproof, especially if the phone has cracks or other damage.

    If your iPhone gets wet, disconnect cables and wipe the outside with a soft, lint-free cloth. Do not plug it in while the connector is wet. Leave it in a dry area with airflow. Do not use a hair dryer, compressed air, rice, or objects inserted into the connector. Follow Apple’s liquid-detection instructions if a warning appears.

    After saltwater exposure, seek advice for your specific model and condition rather than rinsing or submerging a damaged phone. If it shuts down, the screen malfunctions, or charging problems persist, arrange an inspection. Drying the outside does not establish that the inside is undamaged.

    Keep sand out of ports and cases

    Store the phone in a closed bag or pouch rather than directly on the sand. Before putting it back in its case, check for trapped grit that could scratch the finish. If sand is lodged in the charging port, do not force a cable into it or dig it out with a pin. Have the port inspected if the connector will not fit normally.

    Handle moisture and cleaning carefully

    Keep the phone separate from wet towels, swimsuits, and damp bags. If you notice moisture, dry the exterior before putting it away or connecting accessories.

    For routine exterior cleaning, unplug cables and turn off the phone. Use a soft, slightly damp, lint-free cloth and keep moisture out of openings. Avoid abrasive cleaners and spraying liquid directly onto the device. Check your model’s cleaning instructions before using disinfectants.

    When to bring your iPhone in

    Persistent charging trouble, unexpected shutdowns, a flickering screen, or problems after water exposure deserve an inspection. Tell the technician what happened and whether the phone was connected to power afterward. Back up important data when the phone is working normally; do not keep powering on a damaged phone just to test it.

    Learn about iPhone repair in Jupiter, or see our Jupiter store and other repair services.

    Visit iFixYouri Jupiter: 5500 Military Trail, Suite 32, Jupiter, FL 33458. Call (561) 619-6600 to discuss the problem before your visit. Walk-ins are welcome.

    Why Trust a Local Jupiter iPhone Repair Shop with Your Device?

    In today’s fast-paced world, your iPhone is more than just a gadget; it’s your lifeline. From staying connected with loved ones to managing work tasks on the go, your iPhone plays a crucial role in your daily life. So when it breaks, choosing the right repair service is essential. While it might be tempting to send your device to a big-name service center or try an online repair option, there are compelling reasons to trust a local Jupiter iPhone repair shop with your device. In this blog, we’ll explore the benefits of choosing a local repair shop and why it’s the best decision for your iPhone.

    1. Personalized Service: You’re Not Just Another Customer

    One of the main advantages of choosing a local iPhone repair shop in Jupiter is the personalized service you receive. Big-name service centers and online repair options often treat you as just another ticket in their queue. In contrast, local shops take the time to understand your specific issue and provide tailored solutions.

    At a local shop like iFixYouri in Jupiter, you’ll interact directly with the technician who will be working on your device. This face-to-face interaction allows you to explain the problem in detail, ask questions, and gain a better understanding of the repair process. This level of personalized attention ensures that your iPhone receives the care it needs, and you leave feeling confident in the service provided.

    2. Quicker Turnaround Times: Get Your iPhone Back Sooner

    We’ve all experienced the frustration of being without our phone for days or even weeks while waiting for a repair. When you send your iPhone away to a distant service center, you’re often at the mercy of shipping delays and busy repair schedules. On the other hand, local repair shops in Jupiter typically offer much quicker turnaround times.

    At iFixYouri, most common repairs, such as screen replacements and battery swaps, can be completed the same day, often within a couple of hours. This means you can get back to your routine with minimal disruption. Plus, if any issues arise after the repair, you can easily return to the shop for further assistance without dealing with the hassle of shipping your device again.

    3. Support Local Business: Strengthen the Jupiter Community

    Choosing a local iPhone repair shop in Jupiter isn’t just about convenience—it’s also about supporting your community. Local businesses are the backbone of the Jupiter economy. When you spend your money at a local shop, more of it stays within the community, helping to create jobs, support local families, and contribute to the overall economic health of the area.

    Additionally, local businesses are more likely to give back to the community through sponsorships, donations, and other forms of support. By choosing a local repair shop, you’re not only getting quality service but also helping to build a stronger, more vibrant Jupiter.

    4. Expertise You Can Trust: Specialized Knowledge and Experience

    Local iPhone repair shops in Jupiter often specialize in specific types of repairs, giving them a deep understanding of the issues that commonly affect iPhones in the area. This specialized knowledge is particularly important in a coastal environment like Jupiter, where factors such as humidity, salt air, and sand can contribute to unique problems.

    The technicians at iFixYouri are experienced in dealing with the specific challenges that come with living in Jupiter. Whether it’s corrosion from salt air, water damage from a day at the beach, or sand stuck in your charging port, you can trust that your device is in capable hands.

    5. Transparent Pricing: No Hidden Fees or Surprises

    One of the most frustrating aspects of getting your iPhone repaired can be the unexpected costs. Some repair services might quote you one price only to add on hidden fees later. This can lead to an unpleasant surprise when you go to pick up your device.

    Local repair shops like iFixYouri pride themselves on transparent pricing. When you bring your iPhone in for a repair, you’ll receive a clear estimate of the costs upfront. If any additional issues are discovered during the repair, the technician will contact you to discuss your options before proceeding. This transparency builds trust and ensures that you’re never caught off guard by unexpected charges.

    6. High-Quality Parts: Ensuring Longevity and Performance

    When it comes to repairing your iPhone, the quality of the parts used is crucial. Big-name repair services might use generic parts to keep costs down, which can affect the performance and longevity of your device. Local repair shops in Jupiter, however, are more likely to use high-quality parts that match the original specifications of your iPhone.

    At iFixYouri, we use only the best parts available to ensure that your iPhone functions like new after the repair. Whether it’s a screen replacement, battery swap, or any other repair, you can trust that your device will continue to perform well long after you leave the shop.

    7. Local Reputation: Accountability You Can Count On

    In a close-knit community like Jupiter, reputation matters. Local repair shops rely heavily on word-of-mouth referrals and repeat business. They know that a single bad review or dissatisfied customer can significantly impact their reputation.

    Because of this, local shops like iFixYouri are highly motivated to provide excellent service every time. They’re accountable to their customers in a way that big-name service centers simply aren’t. When you choose a local shop, you can be confident that they’ll go above and beyond to ensure you’re happy with the repair.

    Visit iFixYouri in Jupiter for Expert iPhone Repairs

    When your iPhone needs a repair, choosing a local shop like iFixYouri in Jupiter offers numerous benefits. From personalized service and quick turnaround times to high-quality parts and transparent pricing, local repair shops provide a level of care and expertise that you simply won’t find elsewhere.

    We’re conveniently located in Jupiter, making it easy for you to stop by and get your iPhone checked out. Whether you need a quick screen replacement, battery swap, or any other repair, our experienced technicians are here to help. Trust iFixYouri with your iPhone, and experience the difference that local service can make.

    Here’s where you can find us:

    Trusting a local iPhone repair shop in Jupiter offers numerous advantages over big-name service centers and online repair options. From personalized service and quicker turnaround times to high-quality parts and transparent pricing, local shops like iFixYouri provide a level of care and expertise that’s hard to beat. Plus, by choosing a local business, you’re supporting the Jupiter community and helping to create a stronger, more vibrant local economy.

    Next time your iPhone needs a repair, skip the hassle of shipping it off or dealing with impersonal service centers. Visit iFixYouri in Jupiter and experience the benefits of local, expert care. Your iPhone—and your peace of mind—will thank you.

    Contact us at iFixYouri today:
    Visit iFixYouri