
iPhone 6 lightning port repair is a moderately difficult DIY repair. In other words, some smartphone repair experience
helps. However, a patient hand can complete the repair successfully with these instructions. Above all, have fun. Let’s
get to it!
Tools Needed
- Metal Spudger [BUY NOW]
- Pentalobe Screwdriver #000 [BUY NOW]
- Phillips head Screwdriver [BUY NOW]
- Spudger [BUY NOW]
- Tweezers [BUY NOW]
Recommended: Magnetic mat [BUY NOW], screw capsules [BUY NOW]
Parts Needed:
- iPhone 6 Lightning Port [BUY NOW]
General Repair Guidelines:
- Always use good lighting – smart device components
are small and you’ll need plenty of light to see what you are doing.
- Maintain a clean, organized workspace so you don’t
lose or confuse any components.
Introduction
Lightning port for the iPhone 6 is relatively easy, but it is buried under several components that must be removed in
sequence. This is an important repair because the lightning port component also holds the headphone jack and
microphone. The clasps holding the screen onto the body near the top are at an angle. The flex cable for the screen is
also towards the top. Keep track of your screws as there are quite a few different ones. Let’s do this.
iPhone 6 Lightning Port Removal Steps
Remove the Screen
- After that, unscrew the two pentalobe screws on either side of the lightning dock on the bottom edge of the iPhone 6.
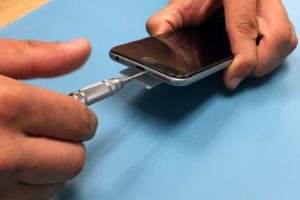
- Use the metal spudger to slowly and carefully separate the glass screen of the iPhone from the body. Start on
the bottom edge of the device and proceed slowly. The flex cable for the screen is at the top. 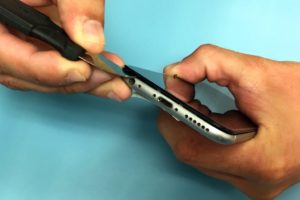
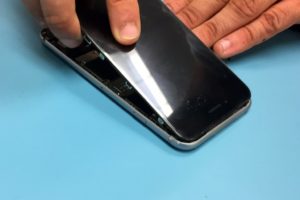
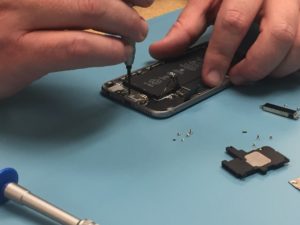
- Slowly pull the top of the screen away from the body and locate the EMI (electromagnetic interference) shield located by the bottom right of the battery.
- Unscrew the two screws securing the EMI shield to the logic board and remove it.
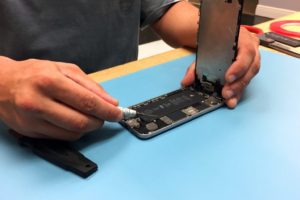
- Using a spudger, disconnect the battery cable from the logic board.
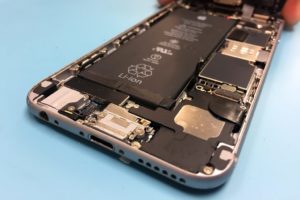
Remove Loudspeaker, Vibrator
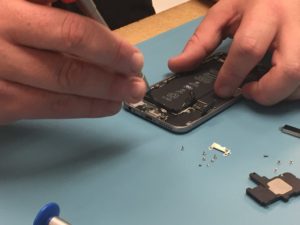
- Right next to the lightning port connection there is a small black circle connected by a gold contact to a
black wire. This is the antenna and it should be disconnected using the spudger. 
- In the bottom right of the iPhone 6, the loudspeaker sits. It is a larger black component held in place by Four
Phillips head screws hold it in place. It should be removed next. Unscrew the four screws and gently pry it
out, using caution to not catch the antenna while you are pulling it out. 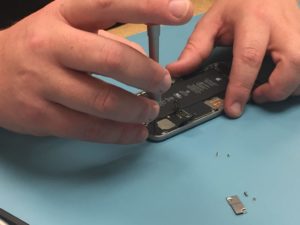

- After that, we will remove the vibrator, a black rectangle. It runs horizontally under the battery, on the bottom left of the phone. Two Phillips head screws hold it in place.

Remove Microphone Brace, Unscrew Lightning Port
- Remove the small black plastic brace that holds the microphone in place between the lightning port and the
headphone jack. 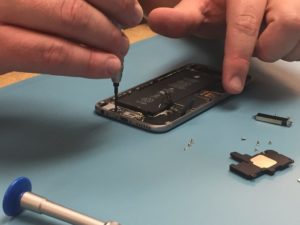
- After that, remove the two screws on the top edge of the headphone jack component, the light grey square in the
bottom left of your iPhone (above the headphone jack hole).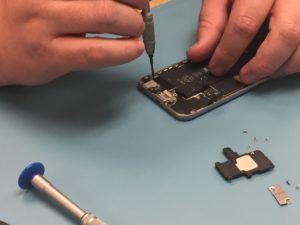
- Next, unscrew the six screws on the sides of the lightning port. They sit symmetrically, three on each side.
- You have now completed detaching the lightning port assembly. After that, it can be removed from the housing.
However, if the microphone sticks, gently pry it with your spudger. - Voila! You completed the mission. Work through
the steps in reverse to install a new lightning port. 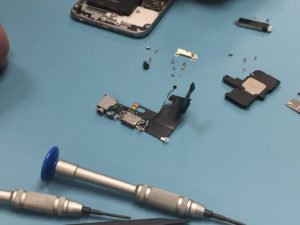
For Help, Repairs, or Parts
In conclusion, if you need parts or tools for this repair, or if this repair is too much to attempt on your own and you
need professional help with your iPhone 6 repair,
contact iFixYouri at 888-494-4349or www.ifixyouri.com.